How to configure the network on ESXi 5.5/6.0/6.6 virtual machine on dedicated servers
This guide covers network configuration for virtual machines running on ESXi 5.5, 6.0, and 6.6 on Servers.com dedicated servers, including adding port groups for private networking, uploading OS images to the datastore, and configuring network interfaces inside the guest OS.
Setting up and installation of virtual machines
Adding a port group for a private network
A setup script creates only one port group: "VM Network" on vSwitch0. This port group is used for the public network on the virtual machine. If you need to set up a private network, you must add another port group on vSwitch1. To do this:
- Click Add port group

- Specify the Name and Virtual switch for the new port group
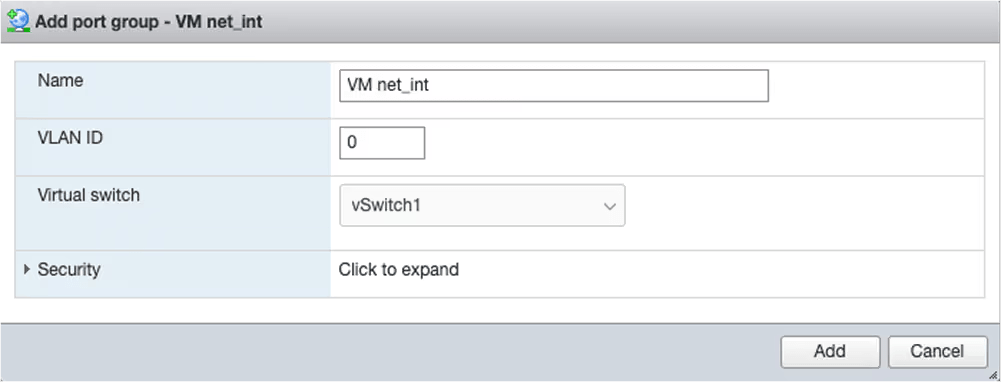
- Click Add
You will get a ready port group that can be used when creating a virtual machine.
Adding images
To add images for future virtual machines:
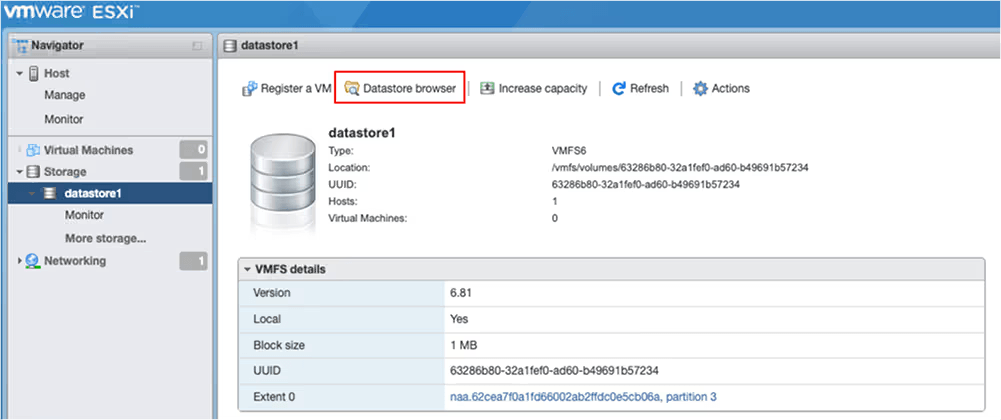
- On the Storage page, navigate to the storage you are using and click Datastore browser
- In the opened window, click Create directory and specify the name "images". Then, select the created directory, click Upload and choose the image to upload
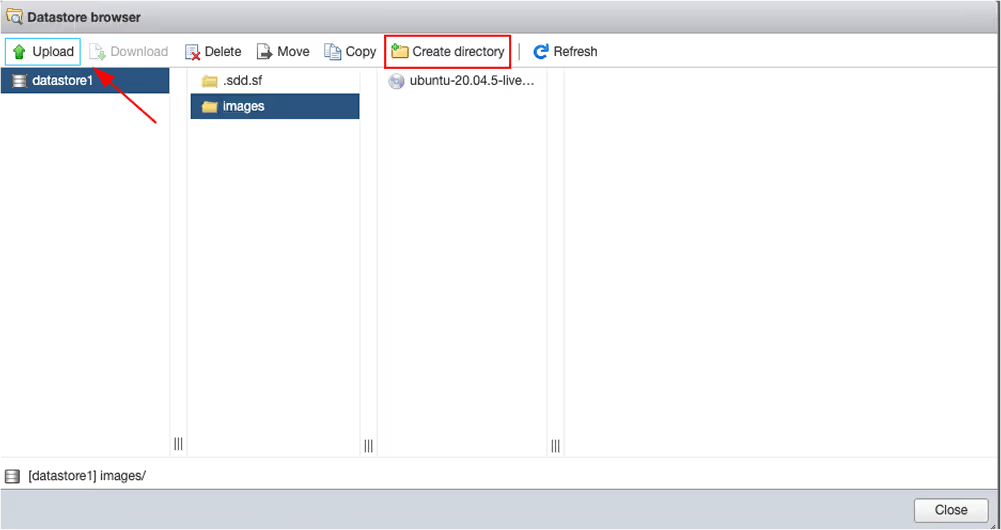
The upload process will be displayed in the window or in Recent tasks at the bottom of the page. Once complete, the image can be used to create a virtual machine.
Creating a virtual machine
- Go to the main Host page or the Virtual Machines page and click Create/Register VM
- Select Create a new virtual machine and click Next
- Specify the name of the virtual machine, the Guest OS family, and the Guest OS version
- Click Next
- Choose the storage to be used for the installation and click Next
- In the next window, select the necessary resources for the virtual machine
- Configure public and private networks:
- Add another network adapter by clicking Add network adapter if both public and private networks are needed
- Specify the public (VM Network) and private (VM net_int) port groups for the adapters
- Expand the CD/DVD Drive 1 section and choose Datastore ISO file from the drop-down menu
- Click Browse and specify the path to the previously uploaded image
- On the last page, review the selected parameters and click Finish
- Go to the virtual machine page, open the console, and complete the OS installation
Network configuration on the virtual machine
A vSwitch acts as a "bridge" to the physical interfaces. To configure the network on the virtual machine, you can use the IP addresses and gateway assigned to the physical server network.
To use an alias IP address, assign it as the primary on the interface included in the public vSwitch port group, and use the main public network's gateway as the gateway.
Ubuntu
For a virtual machine running Ubuntu 20.04:
/etc/netplan/00-installer-config.yaml
network:
  ethernets:
    ens18:
      dhcp4: false
      addresses:
      - $IP/$NETMASK
      routes:
        - to: 0.0.0.0/0
          via: $PUBLIC_GW
          on-link: true
      nameservers:
        addresses:
        - $DNS_SERVERS
    ens19:
      dhcp4: false
      addresses:
      - $PRIVATE_IP/$NETMASK
      routes:
        - to: 10.0.0.0/8
          via: $PRIVATE_GW
        - to: 192.168.0.0/16
          via: $PRIVATE_GW
        - to: 188.42.208.0/21
          via: $PRIVATE_GW
      nameservers:
        addresses:
        - $DNS_SERVERS
  version: 2
Where:
$IP– any available IP address in the range assigned to the dedicated server (can also be an alias IP)$NETMASK– the subnet mask (can be /32 if configuring an alias IP)$PRIVATE_IP– the private IP address available to the dedicated server$PUBLIC_GW– the IP address of the gateway in the public network$PRIVATE_GW– the IP address of the gateway in the private network$DNS_SERVERS– DNS servers available to the dedicated server