Identity and Access Management
Identity and access management (IAM) is a set of processes, settings, and policies for account identities, authentication, and authorization. IAM allows you to organize access to Servers.com resources in accordance with your needs in a safe way.
The feature is available in the Customer Portal: Identity & Access → Access Control.
The IAM concept is built upon four terms: resource, resource group, permission policy, and team.
Concepts
Resources
A resource is a subject of identity and access management — for example, a server, an invoice, or a Kubernetes cluster. Each individual server counts as a separate resource. A resource may include child entities or specific operations, such as DedicatedServersOOBAllowPublicAccess — an action to grant public OOB access to a dedicated server.
A resource group is a set of resources grouped by a certain principle.
There are three resource types, defined by their ability to participate in a resource group:
- Assignable to resource groups — a countable resource that can be part of a group, for example, a dedicated server or a Kubernetes node.
- Aggregative — a resource that contains assignable resources within it. Aggregative resources cannot be assigned to a resource group themselves (for example, a Kubernetes cluster that consists of Kubernetes nodes).
- Unassignable to resource groups — an abstract or unaccountable resource that cannot be managed independently, for example, an account, invoices, or requests.
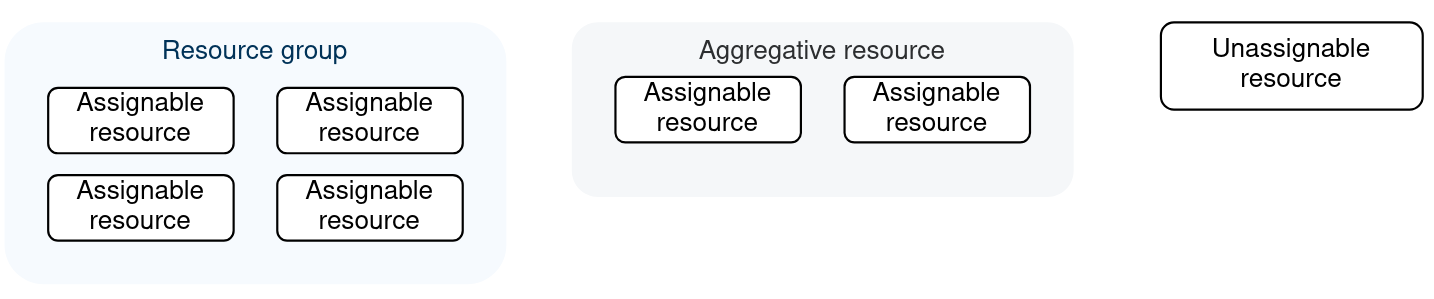
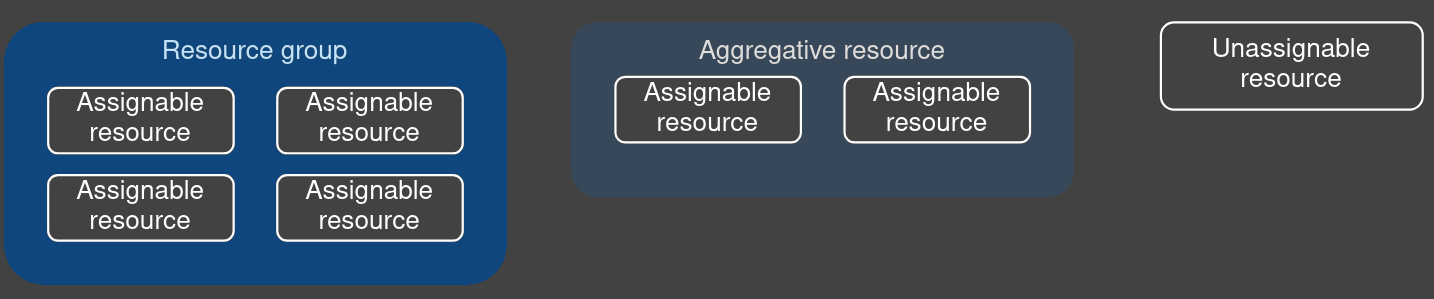
An assignable resource must always belong to a resource group. By default, it is placed in the default resource group. Adding a resource to a custom group removes it from the default one.
Permissions
A permission is the right to perform an action on a resource. The main permission types are:
- Full access — allows all operations on a resource
- Read — allows viewing data without the ability to edit a resource
- Management — allows resource creation, editing, and updating
- Allow delete — allows resources to be deleted
- Allow <action> — allows a specific action
A permission scope is a group of entities united by a certain criteria that can be assigned with permissions.
| Scope | Description | Involved entities |
|---|---|---|
| Administrative | Account management permissions | Accounts, IAM |
| Aggregative | Permissions for aggregative resources | L2 Segments, Firewalls, Kubernetes clusters, Load Balancers |
| Billing | Permissions for finance-related resources | Orders, invoices, account statements, payments |
| Resource-based | Permissions for group-assignable resources (selecting this scope enables the ability to add resource groups) | Dedicated/Cloud/SBM servers, Kubernetes nodes, Cloud Storage, Direct Connect, VPN2GPN, DNS, Private Racks, SSL certificates |
| Support | Permissions for communication with the support team via Requests | Requests |
A permission setting is a list of permissions associated with an entity from a permission scope.
A permission policy is a permission scope with configured settings.
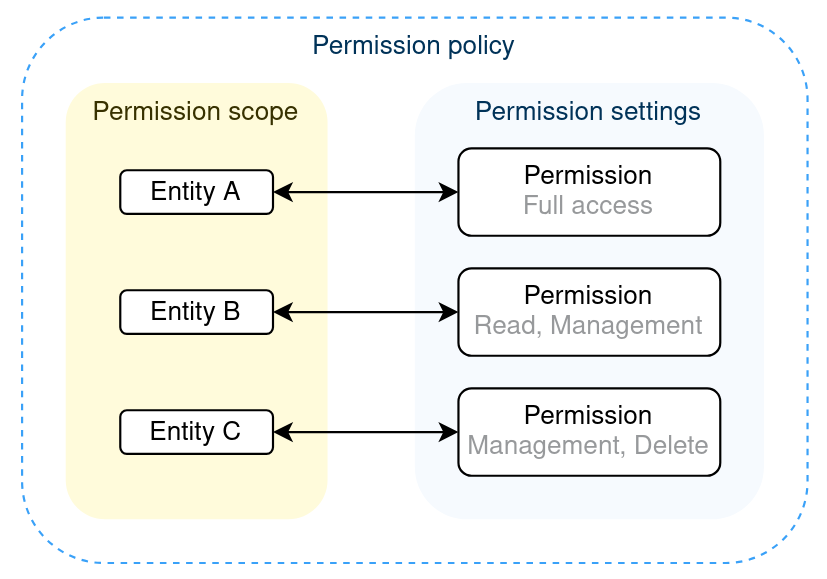
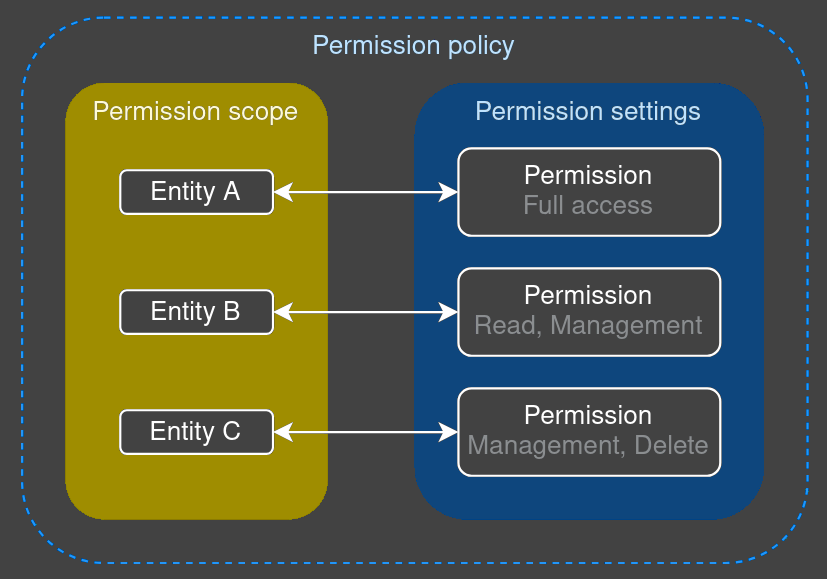
| Permission policy | Description | Permission scope | Examples |
|---|---|---|---|
| Default administrative policy | Full access to account management and IAM. Intended for admins. | Administrative permissions | Accounts, SSH/GPG keys, API tokens, IP allowlists, etc. |
| Default billing policy | Full access to all financial entities. Intended for accounting teams. | Billing permissions | Orders, invoices, payments, account statements, etc. |
| Default support policy | Access to Requests only, allowing users to communicate with technical support. | Support permissions | Requests |
| Default resource policy | Full access to all technical resources. | Permissions by resource scopes | EBM, cloud servers and storage, Kubernetes nodes, etc. |
| Default resource read policy | Read-only access to all technical resources. Typically assigned to the billing team when they need visibility into resources without managing them. | Permissions by resource scopes | EBM, cloud servers and storage, Kubernetes nodes, etc. |
| Default aggregative policy | Full access to aggregative resources that follow a resource → resource member structure. | Aggregative scope | L2 Segments, Kubernetes clusters, Firewall, Load Balancer, etc. |
| Default aggregative read policy | Read-only access to aggregative resources. | Aggregative scope | L2 Segments, Kubernetes clusters, Firewall, Load Balancer, etc. |
| Default technical connectivity policy | Full access to connection and encryption resources; read-only access to IP allowlists. | Administrative scope | SSH keys, GPG keys, API keys, IP allowlists, etc. |
Export, import, duplication
Export and import let you transfer permission policies between accounts without rebuilding them from scratch. Duplication lets you quickly create a copy of an existing policy or team and adjust only what needs to change. Both features require a user to have the IamFullAccess permission.
Export permission policies
Go to Customer Portal → Identity & Access → Access Control → Permission policies, click the three-dot icon next to a policy, and select Export. A JSON file will be downloaded. The file contains the:
- policy name
- scope
- permissions list
- source account number
- export timestamp
The filename follows this pattern:
<permission policy name><account_number><timestamp>.jsonExample: Default_aggregative_read_policy_1_2026-04-22T11-07-46-162Z.json
Import permission policies
Go to Customer Portal → Identity & Access → Access Control → Permission policies and click Import. Upload the JSON file exported from another account. The system validates the file before applying it.
Duplicate permission policies
Go to Customer Portal → Identity & Access → Access Control → Permission policies, click the three-dot icon next to a policy, and select Duplicate. A copy appears in the list. The duplicated policy is not assigned to any teams automatically — you do this yourself. The duplicate is named using this pattern:
<original name> - <timestamp in UTC>Example: Default aggregative read policy - 20260219121700
Duplicate teams
Go to Customer Portal → Identity & Access → Access Control → Teams, click the three-dot icon next to a team, and select Duplicate. The new team is automatically assigned to the same permission policies and account members as the original. The duplicate is named using the same pattern:
<original name> - <timestamp in UTC>Example: Administrators team - 20260422115931
Teams
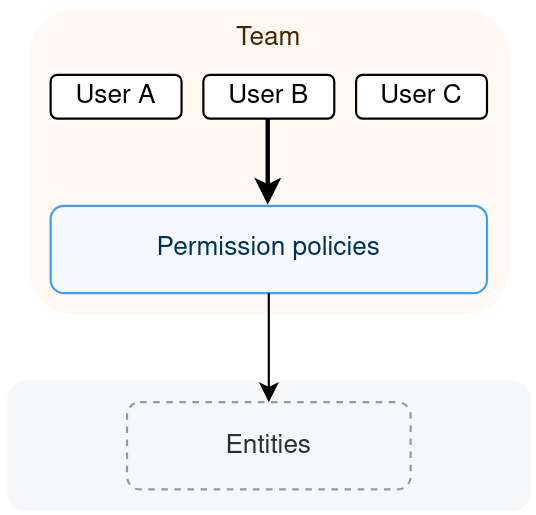
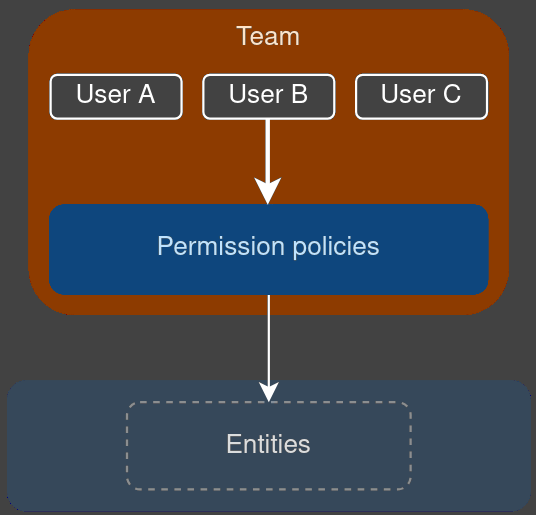
A team is a group of users assigned with permission policies.
Use cases
Department-based account access
The most common IAM scenario is to create a team for each department and assign policies related only to their area of responsibility.
- Create policies with the necessary permission scopes:
- "Management policy" with the administrative permission scope
- "Financial policy" with the billing permission scope
- "Engineering policy" with aggregative, resource-based, and support permission scopes
- Create a team for each department and add users:
- "Management team" with C-level staff and team leaders
- "Financial team" with accountants and financial managers
- "Engineering team" with developers, administrators, and support
- Assign policies to the corresponding teams:
- Management policy to the management team
- Financial policy to the financial team
- Engineering policy to the engineering team
Servers with restricted access
Sometimes department-based access is not enough and certain resources need to be restricted to just a few employees. For example, if you have several database servers that only certified employees are allowed to work with:
- Create a resource group "DB servers" and add the necessary servers to it.
- Create a policy "DB certified policy" with the resource-based permission scope and select the "DB servers" resource group.
- Create a team "DB certified team", add users and the "DB certified policy".
Transfer policies between accounts
Your organization uses two separate accounts — one for production and one for staging. The production account has several permission policies and team configurations that took time to set up. You now need to replicate the same structure in the staging account. Start by exporting each permission policy from the production account. Then switch to the staging account and import the files one by one.
Getting started
This section guides you through configuring IAM correctly.
Step 1–4: Resource group creation (optional)
This part is only needed if you want to use the resource-based permission scope. Otherwise, skip to step 5.
- Go to the Resource groups tab and click + Create.
- Give the group a name and description. Click Save.
- Once the group is created, click it to open its details page.
- On the details page, click + Add resource, select the necessary resources, and click Save.
Step 5–7: Permission policy creation
- Go to the Permission policies tab and click + Create.
- Give the policy a name and description, then select a Permission scope. When the resource-based scope is selected, you can add a resource group created in the previous steps. You will also see the Select all resource groups and apply to new ones checkbox — enabling it applies the policy to all existing resource groups and any new ones added later. Other permission scopes do not use resource groups.
- In the Permission settings section, select the permissions for each entity within the scope. Click Add.
Step 8–9: Team creation
- Go to the Teams tab and click + Create.
- Give the team a name, select Permission policies and Users, then click Save.
All necessary entities for IAM are now configured.