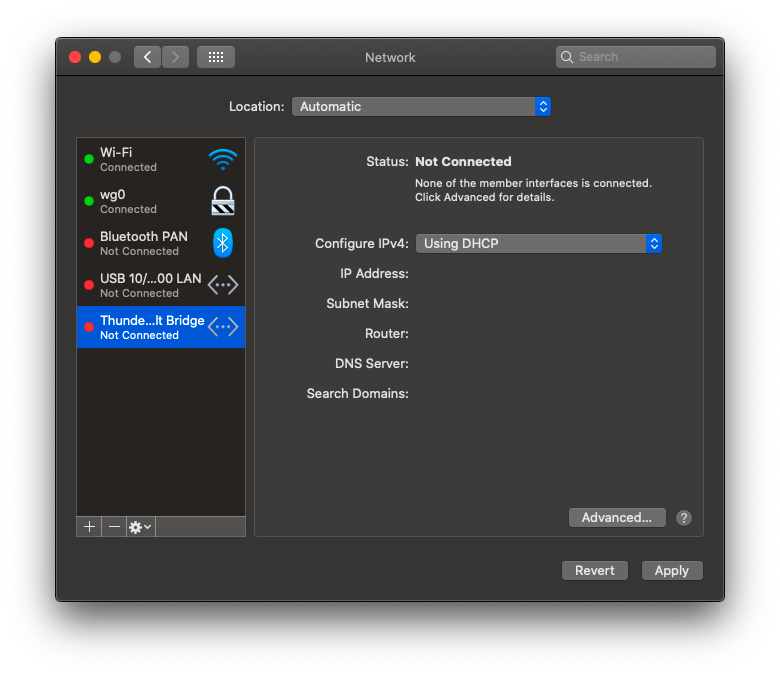
Go to System Preferences → Network, then click the + (Create a new service) button in the bottom-left corner.
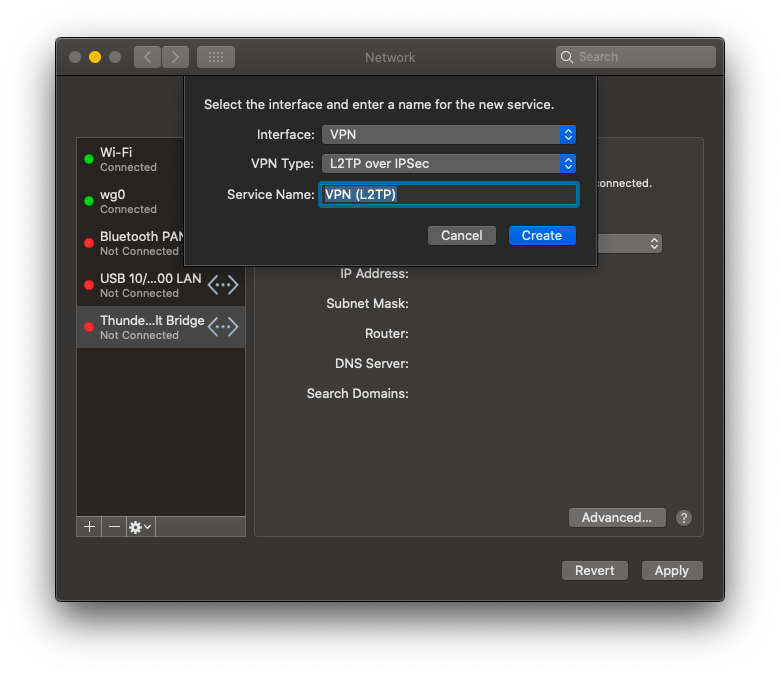
In the dialog:
Select VPN from the Interface list.
Select L2TP over IPSec from the VPN Type list.
Enter a connection name, then click Create.
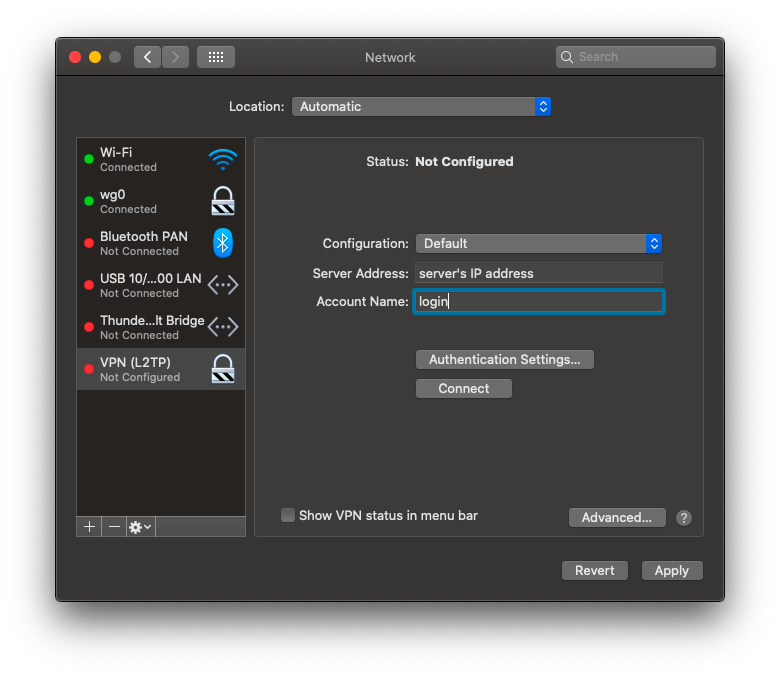
Enter the IP address of your VPN gateway into the Server Address field. The IP address is part of your user credentials.
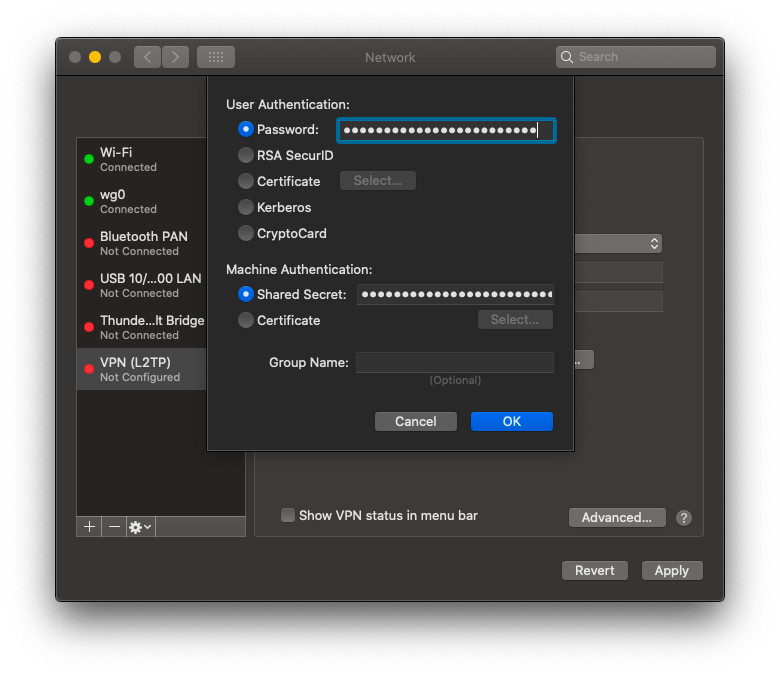
Click Authentication Settings and enter the Password and Shared Secret (both are provided in your user credentials), then click OK.
You can now connect to the VPN from System Preferences → Network by selecting the connection and clicking Connect.
You can set the default netmask for PPP connections by creating the file /etc/ppp/ip-up with the following content:
#!/bin/sh/sbin/route add 10.0.0.0/8 -interface $1
Then make the file executable:
sudo chmod 0755 /etc/ppp/ip-up
Note: If you are connecting from a network that already uses the 10.x.x.x range (for example 10.0.0.0/24), you cannot set a default netmask for PPP connections. Add a specific GPN network route instead:
 You can now connect to the VPN from System Preferences → Network by selecting the connection and clicking Connect.