Setting up Ubuntu built-in VPN client
This guide explains how to configure the Ubuntu built-in NetworkManager L2TP over IPsec VPN client to connect to your VPN gateway.
Before you begin, obtain your VPN credentials. For instructions, see Getting VPN credentials for a user.
Installing required packages
Run the following commands to update your package list and install the L2TP plugin for NetworkManager:
sudo apt update
sudo apt install -y network-manager-l2tp network-manager-l2tp-gnome
Creating the new VPN connection
-
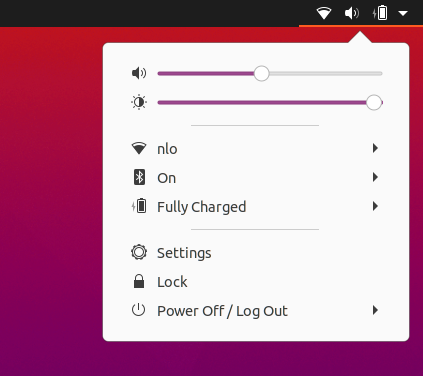
Click the network connection icon in the top-right corner of the desktop and click Settings.
-
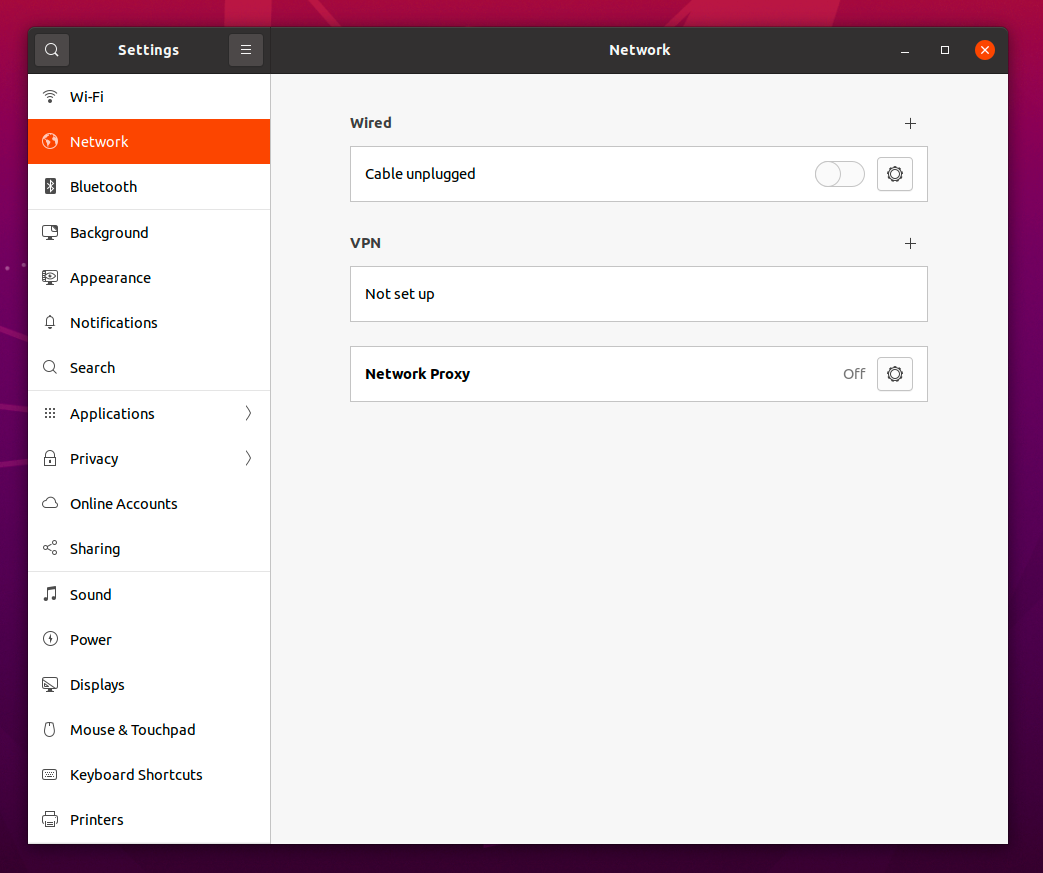
In Settings, select the Network tab on the left. Click the + button next to the VPN label to add a new VPN connection.
-
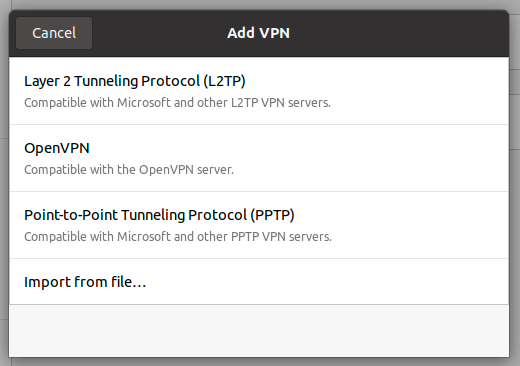
Choose Layer 2 Tunneling Protocol (L2TP) as the tunneling protocol.
-
Fill in the connection details using your user credentials:
- Gateway: your VPN gateway IP address
- User name: your Login
- Password: your Password
Click the user symbol in the password field and select Store the password only for this user.
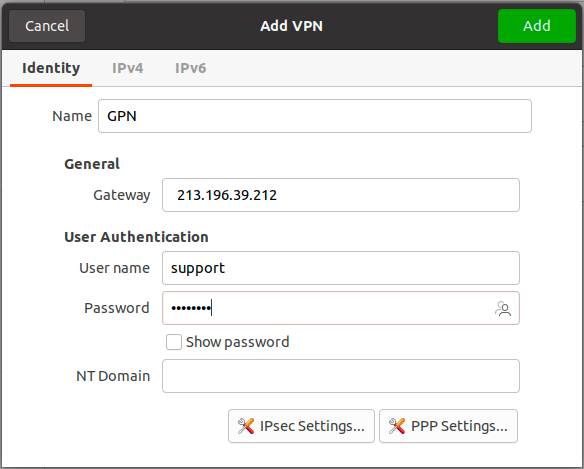
-
Click IPsec Settings… to open the IPsec configuration panel.
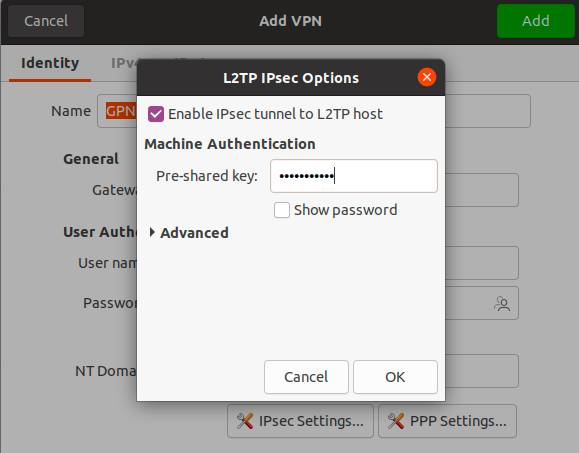
- Check Enable IPsec tunnel to L2TP host.
- Enter your Shared Secret in the Pre-shared key field.
- Click Advanced and set:
- Phase1 Algorithms:
ike=aes128-sha1-modp2048 - Phase2 Algorithms:
esp=aes128-sha1
- Phase1 Algorithms:
- Click OK.
-
Open the IPv4 tab and scroll to Routes. Add a route as shown below, then click Add.
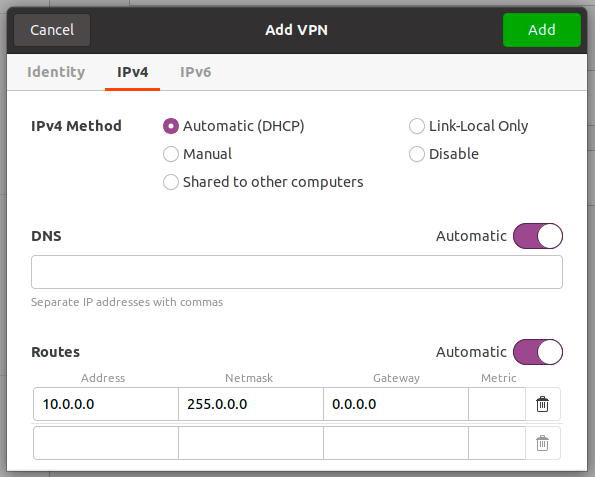 Save the connection by clicking Add.
 -
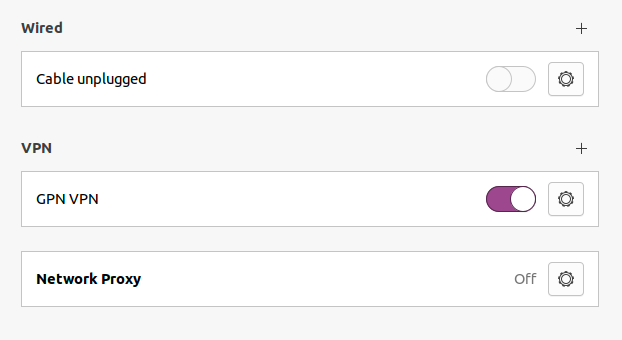
Toggle the VPN connection on in Settings → Network → VPN to confirm it connects successfully.