How to get OOB credentials via public API
OOB (Out-of-Band) is a method of remote server management that allows interaction with hardware via a separate network interface, independent of the operating system or primary network state.
You can find more details on accessing and authenticating to OOB and iDRAC in: How to access the OOB management of a Dell server.
GPG keys
A GPG (GNU Privacy Guard) key is a cryptographic tool used for encryption, decryption, digital signatures, and data authentication. It is based on asymmetric cryptography and consists of a key pair:
- Public key — used for encryption and verifying signatures.
- Private key — used for decryption and creating signatures.
GPG keys can be customized to meet specific requirements, including key length, algorithm, expiration date, and other parameters.
Steps to obtain OOB credentials
The process of obtaining OOB credentials involves the following steps:
- Add a GPG key to the Customer Portal and obtain its fingerprint.
- Execute API requests to retrieve the server ID and OOB credentials.
- Decrypt the received message using GPG decryption.
Detailed instructions for each step are provided below.
Add a GPG key to the Customer Portal
Since GPG keys are used for sensitive tasks and require strict security control, their creation is the user's responsibility. Only users with the Owner role can add them to the Customer Portal. Unlike SSH key generation, the Customer Portal only supports adding GPG keys with the RSA/RSA type.
To add your GPG key:
-
In the left-hand menu, navigate to Identity and Access → SSH & GPG keys.
-
Scroll to the GPG keys section and click Create.
-
In the Public key field, enter or paste your public key.
Ensure the key is fully copied, including all lines from
-----BEGIN PGP PUBLIC KEY BLOCK-----to-----END PGP PUBLIC KEY BLOCK-----, with no extra spaces or characters. -
Enter the key name and click Create.
The public part of your GPG key will be added.
Obtain a GPG key fingerprint in the Customer Portal
The GPG key fingerprint is a unique sequence of characters representing the hash of a public key. It is used in API requests and ensures the public key has not been altered during transmission. Additionally, the fingerprint serves as a compact identifier for authentication and key validation.
To display the key fingerprint:
- In the Customer Portal, navigate to Identity and Access → SSH & GPG keys → GPG keys.
- The fingerprint is displayed next to the added key.
Obtain the server ID via Public API
Before you begin, ensure the following prerequisites are met:
- The required server is provisioned and ready.
- An API key has been created in the Customer Portal under Identity and Access → API tokens.
All Public API requests must include your authentication token and should be executed using cURL commands.
To obtain the server ID:
-
Make a GET request to the Public API:
curl -g "https://api.servers.com/v1/hosts" -X GET \
  -H "Authorization: Bearer TOKEN"
Replace
TOKENwith your API key. The same request using the srvctl CLI, which reads the token from a saved context instead:srvctl hosts list -
Find the server ID in the response list.
-
Alternatively, open the Customer Portal and navigate to Enterprise Bare Metal → Manage → Your_Server → Details → ID.
For this example, the server ID is ex4mp1e.
Retrieve OOB credentials via Public API
To request OOB credentials via the Public API, you need your GPG key fingerprint. For this example, the fingerprint is F1NGERPR1NT123456.
curl -g "https://api.servers.com/v1/hosts/dedicated_servers/{server_id}/oob_credentials/?fingerprint={fingerprint}" -X GET \
  -H "Authorization: Bearer TOKEN"
The same request using srvctl:
srvctl hosts ebm get-oob-credentials {server_id} --fingerprint {fingerprint}| Parameter | Description | Example |
|---|---|---|
server_id | The server ID | ex4mp1e |
fingerprint | GPG key fingerprint | F1NGERPR1NT123456 |
TOKEN | The API token from the Customer Portal | TtOo123KkEe456Nn |
The API response will include a string called the secret, which contains data encoded in Base64 format.
Decode the secret from Base64 format
Linux/macOS
echo "base64-encoded-secret-string" | base64 --decode > decoded_secret.ascReplace base64-encoded-secret-string with the actual secret from the API response. The decoded secret will be saved in decoded_secret.asc.
Windows
-
Save the Base64-encoded secret to a file.
-
Use the
certutilutility:certutil -decode inputfile decoded_secret.ascWhere:
inputfileis the file containing the secret.decoded_secret.ascis the file where the decoded secret will be saved.
After decoding, decoded_secret.asc will contain the secret in PGP MESSAGE format, encrypted using your private PGP key.
Extract the OOB password using GPG decryption
Ensure you have the private key corresponding to the public key used for encryption. The key must be imported into your GPG keyring and have the [E] (encryption) attribute.
macOS / Linux
Verify your keys
gpg --list-secret-keysExample output:
sec   rsa4096 2025-01-24 [SC]      F1NGERPR1NT123456
uid           [ultimate] User Name <your-email>
ssb   rsa4096 2025-01-24 [E]
Where:
- The main key (
sec) has[SC]attributes for signing and certification. - The subkey (
ssb) has the[E]attribute for encryption and decryption.
If no key with the [E] attribute is listed, you cannot decrypt the PGP message. Refer to How to create a subkey.
Decrypt the PGP message
gpg --decrypt decoded_secret.ascEnter the passphrase for your private key if prompted. The output will include the password for OOB access.
Windows
To decrypt the PGP message on Windows, you can use Kleopatra:
- Download Kleopatra from its official website and install it.
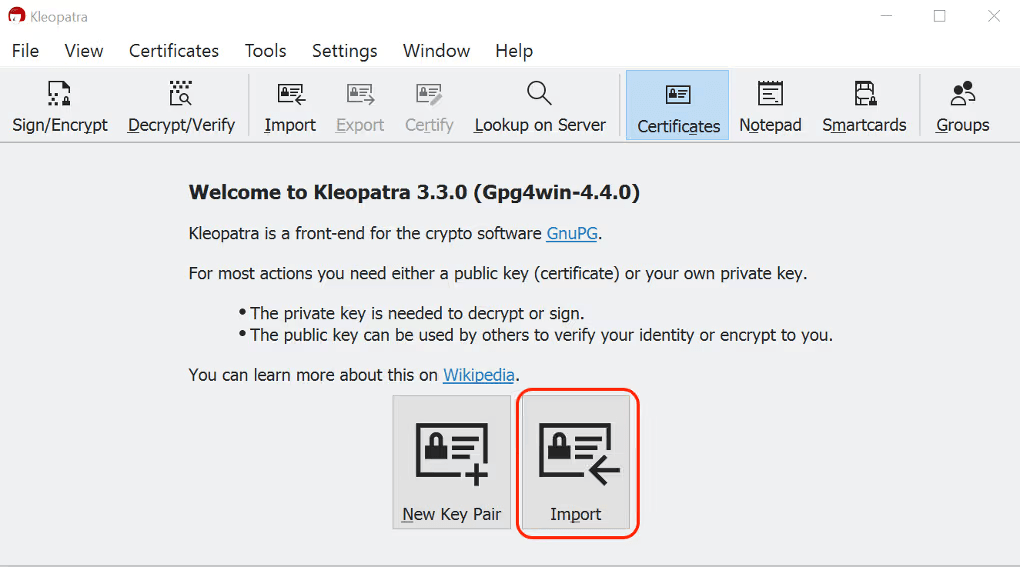
- Open Kleopatra, click Import, and select the private key file to import.
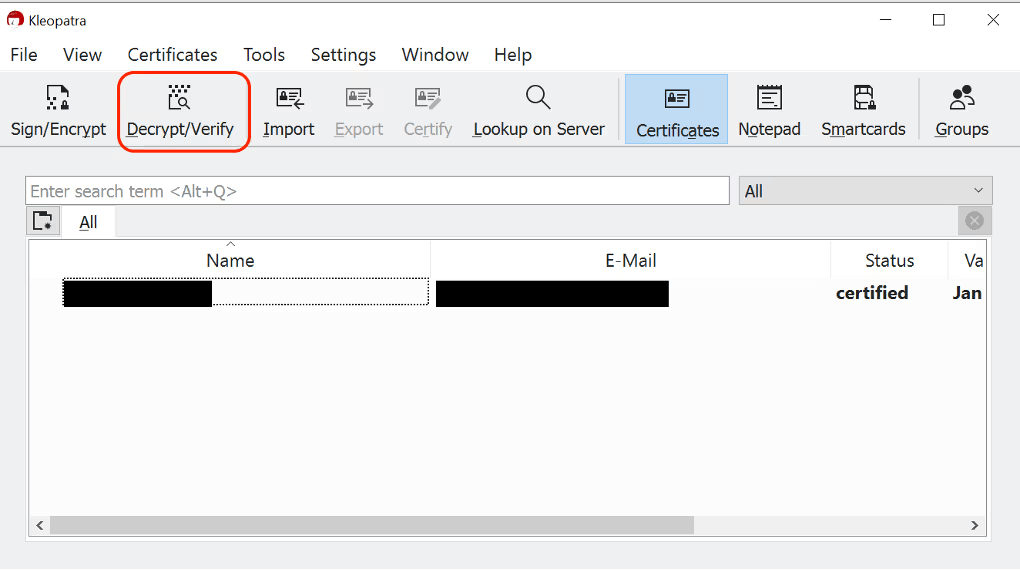
- Click Decrypt/Verify.
- Select the file containing the decoded secret (e.g.,
decoded_secret.asc).
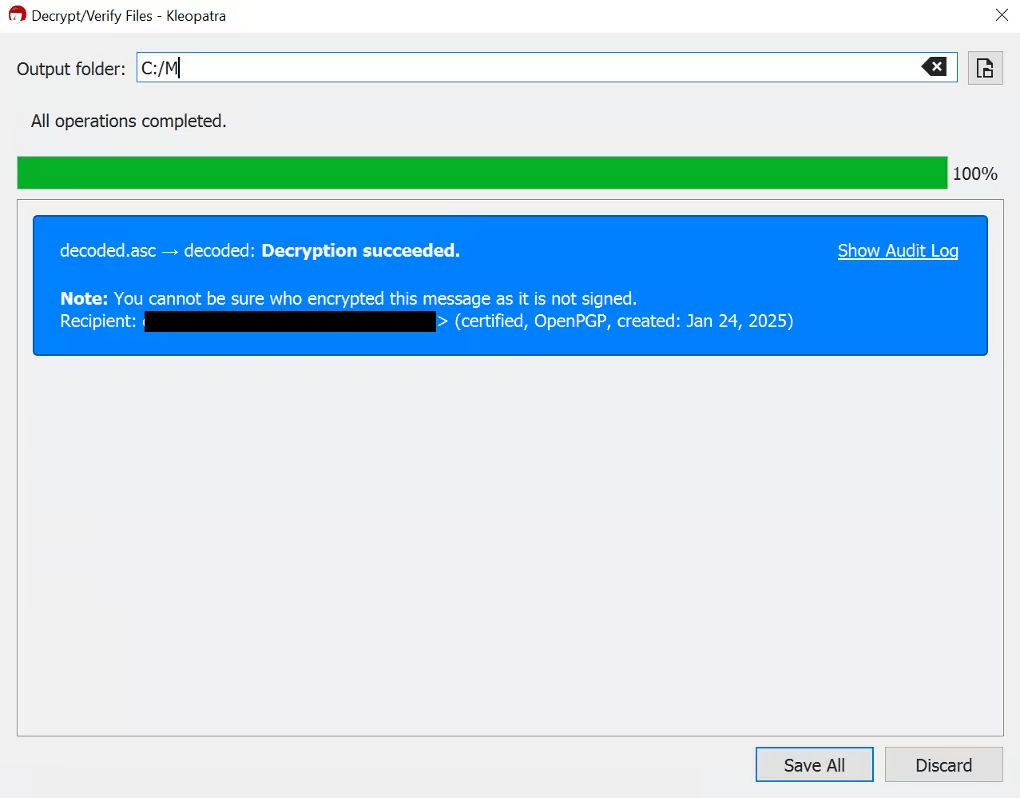
- Click Save all to save the decrypted output.
The OOB credentials will be saved in a newly created file.
How to create a subkey
When working with GPG keys, you may encounter the error used key is not marked for encryption use when trying to decrypt data. This typically occurs when the main key [SC] does not support encryption and decryption. The steps below explain how to create an [E] (Encrypt) subkey to resolve this issue.
macOS / Linux
-
List your keys:
gpg --list-keys --keyid-format LONGFind the fingerprint for your main key (e.g.,
F1NGERPR1NT123456LONG123456789). -
Edit the key:
gpg --edit-key "F1NGERPR1NT123456LONG12345678" -
Add a subkey:
addkey -
Configure the subkey:
-
Choose the subkey type, e.g., RSA (encryption only).
-
Set the key length, e.g., 3072 bits.
-
Define the key expiration date, or choose
0for no expiration. -
Confirm the creation and save changes:
save
-
-
Verify the subkey:
gpg --list-keys --keyid-format LONGExample output:
sec rsa4096 2025-01-24 [SC] F1NGERPR1NT123456 uid [ultimate] Your Name <your-email> sub rsa4096 2025-01-24 [E] -
Export the updated public key:
gpg --export --armor "your-email" > public_key.asc -
Open
public_key.ascand add the updated key to the Customer Portal under Identity and Access → SSH & GPG keys → GPG keys.
If the fingerprint has changed, update your API request with the new fingerprint, then obtain and decode a new secret from Base64 format.