
How to install Ubuntu with software RAID-1
RAID "Redundant Array of Independent Disks" is a method of using multiple disks for different combinations to increase the reliability of data storage and/or improve performance of read/write operations, depending on the RAID level.
There are two types of RAID implementation:
1. Software
A special OS driver looks after physical media, and the OS works with a virtual combined disk space.
2. Hardware
A special controller looks after the physical media, the OS works with a virtual combined disk space.
In this case, we will set up software RAID of the first level, which will give the system disk resource two positive features:
1. Fault tolerance. RAID-1 is a mirrored disk array, and the disks are complete copies of each other. Should one of the disks fail, another one will perform its functions.
2. Increased productivity of reading discs as this operation can be performed simultaneously on two discs.
The following disk layout will be used:
Software RAID -1
/boot - 512MB
swap - 4GB
/ - all rest1. Start the installation of Ubuntu, choose manual disk partitioning (). Clear the disks of sections, if any:
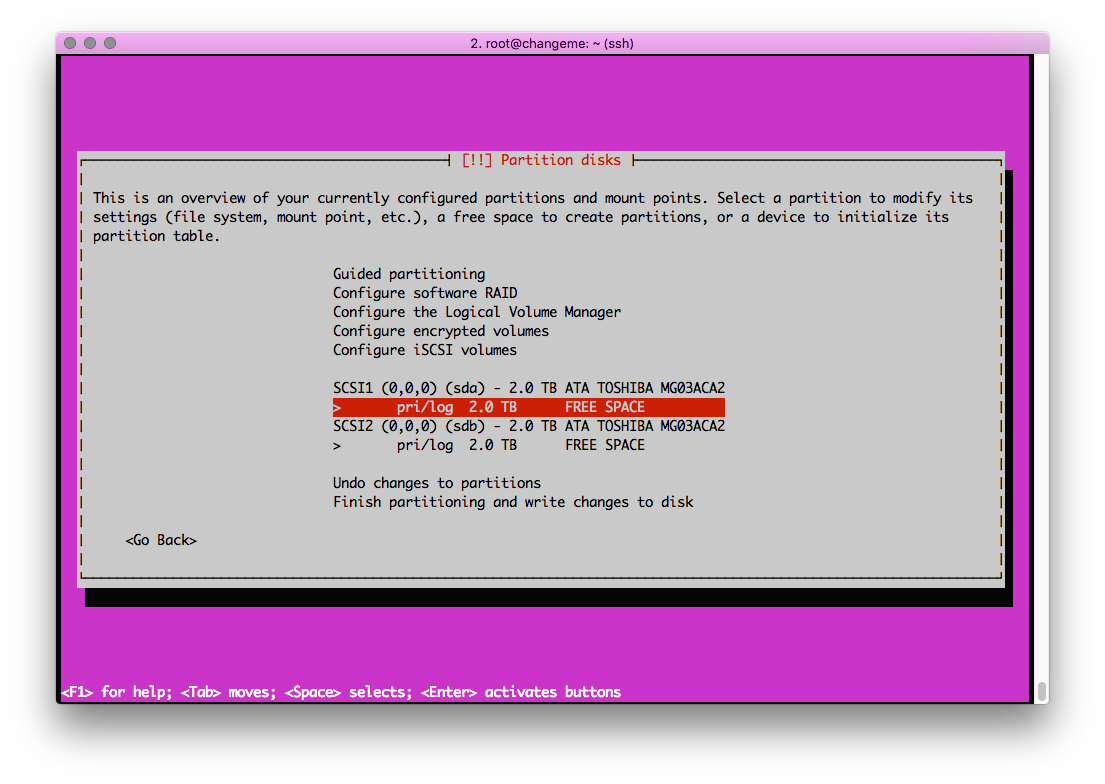
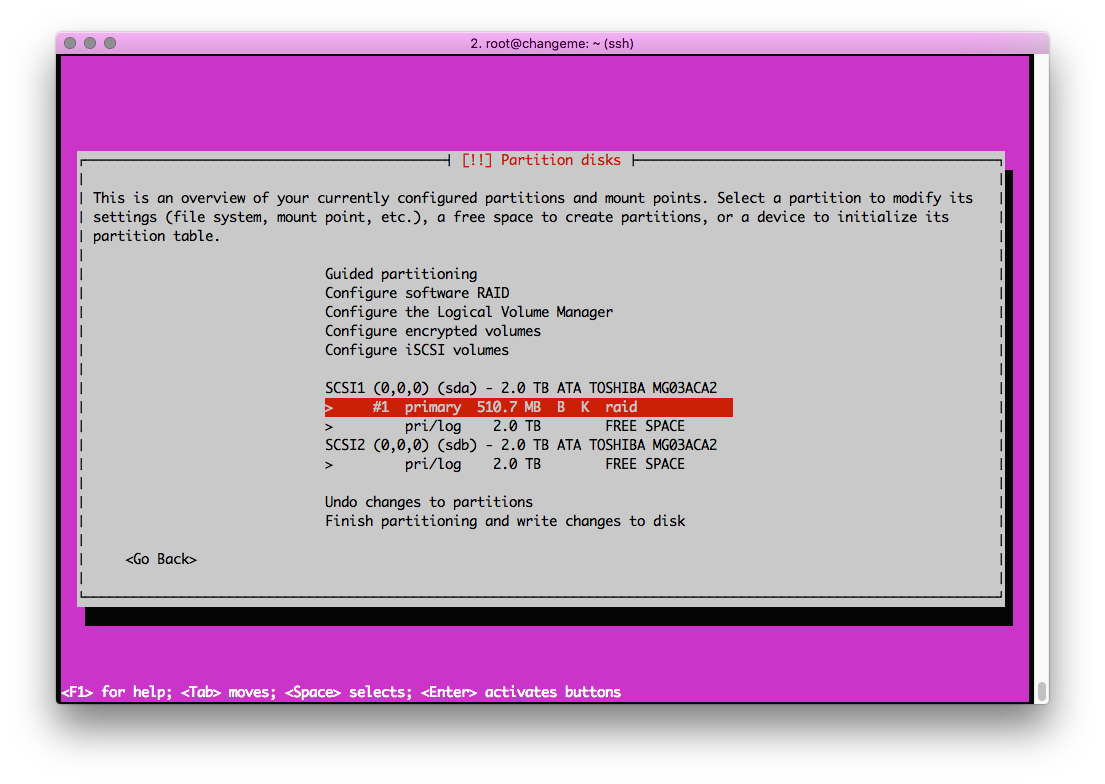
2. Create an (sda) partitioning of 512MB on the first disk:

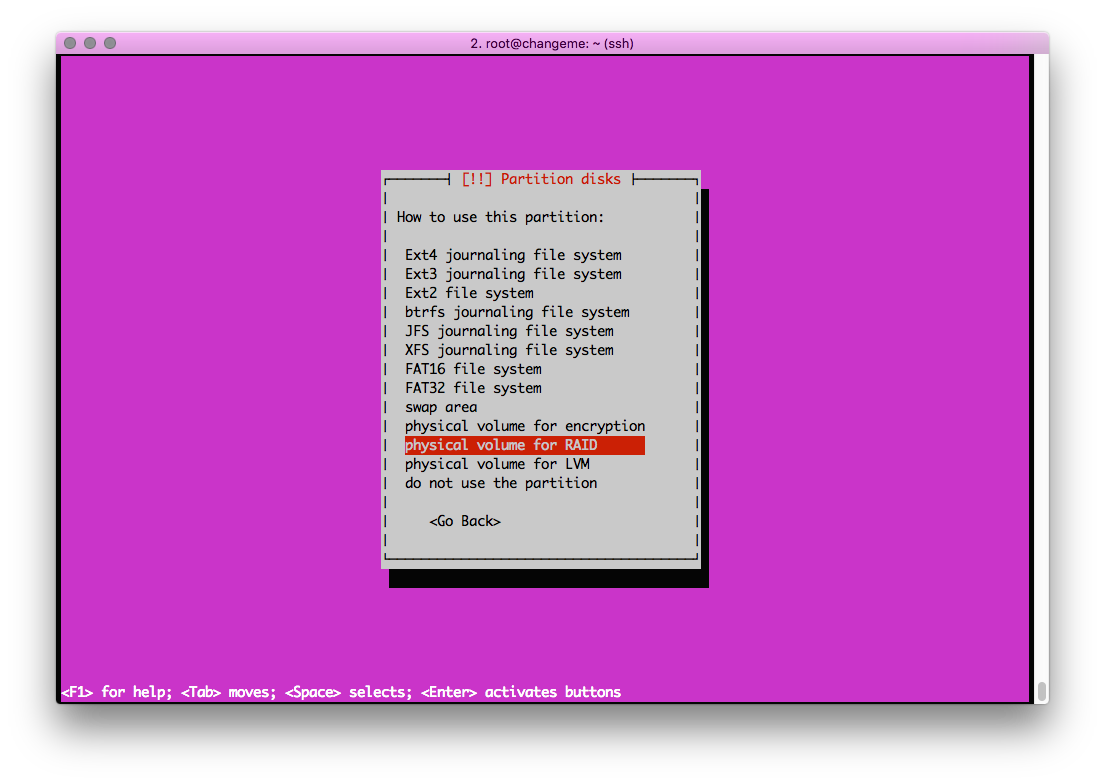
3. Choose the partitioning type – RAID:
4. Complete by clicking "Done setting up the partition":
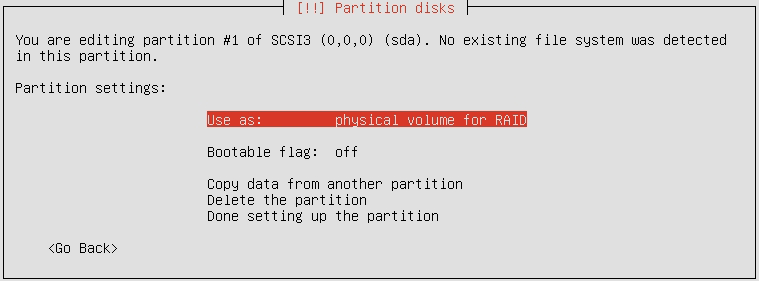
For the /boot partitioning (512mb), select Bootable flag: on
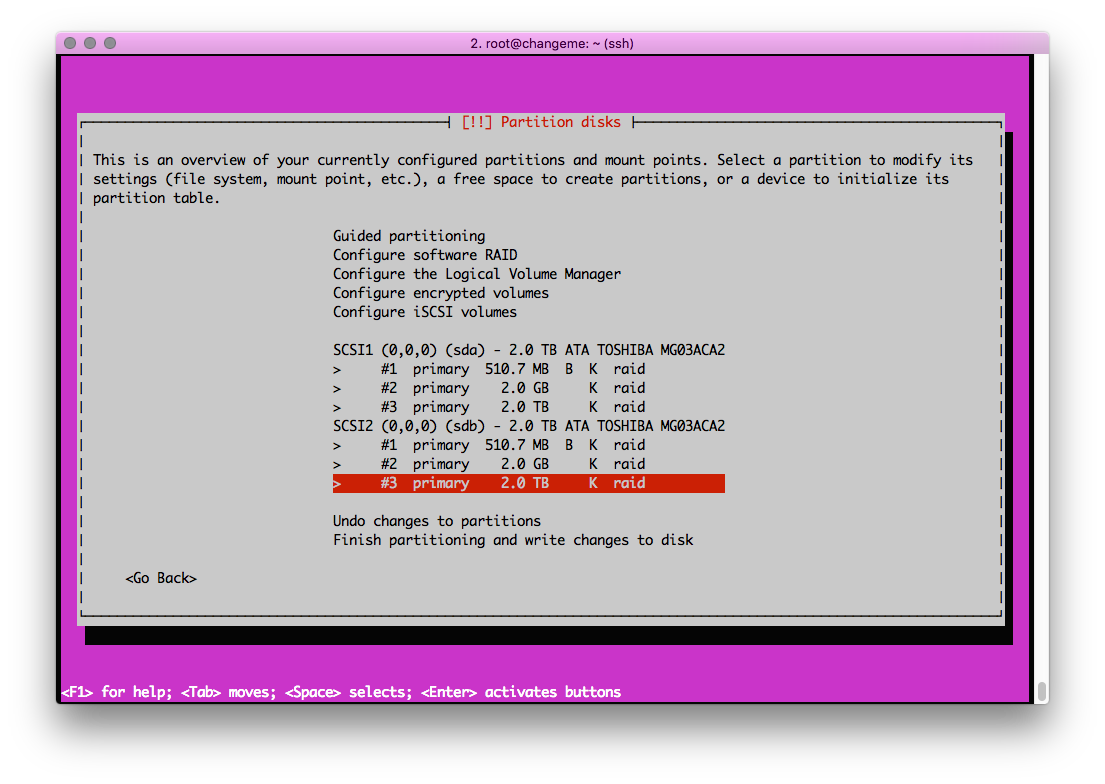
5. Here is what we get:
6. Then, create a 4GB RAID partitioning, and leave the rest of the space for the last partitioning.
7. Repeat the layout for the second disk (sdb). Here is what we get in the end:
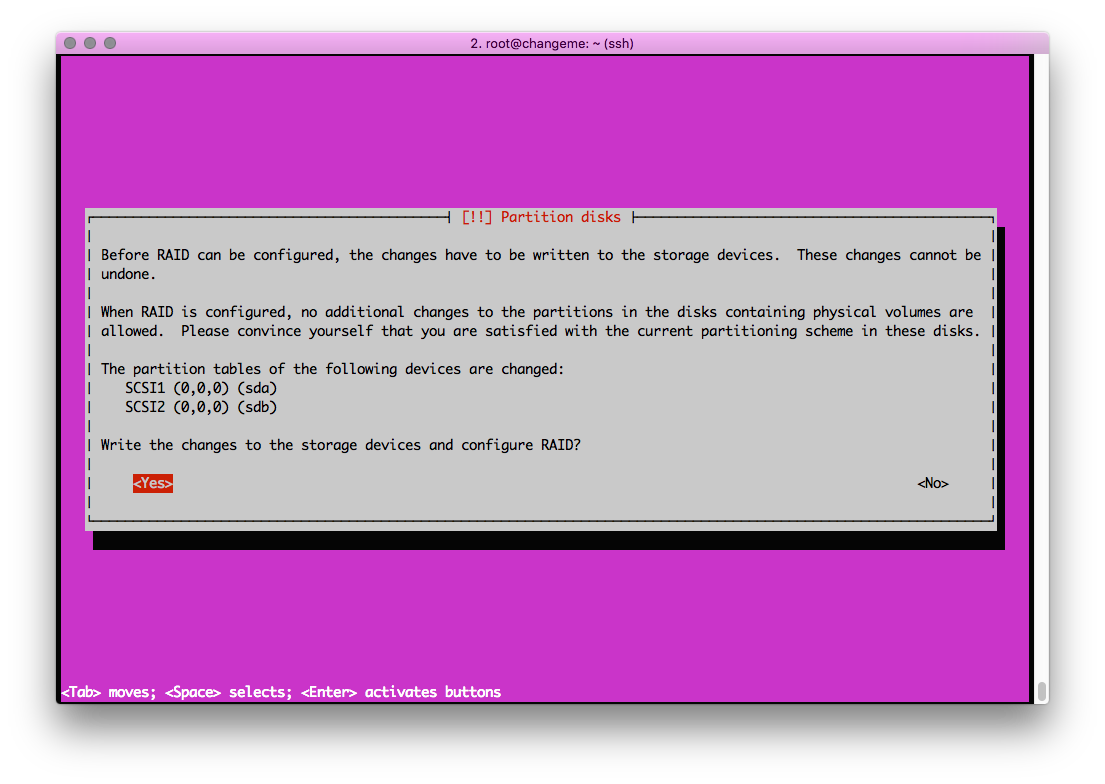
8. After this operation, select software RAID. Indicate which partitionings are to be mirrored. Click Yes:
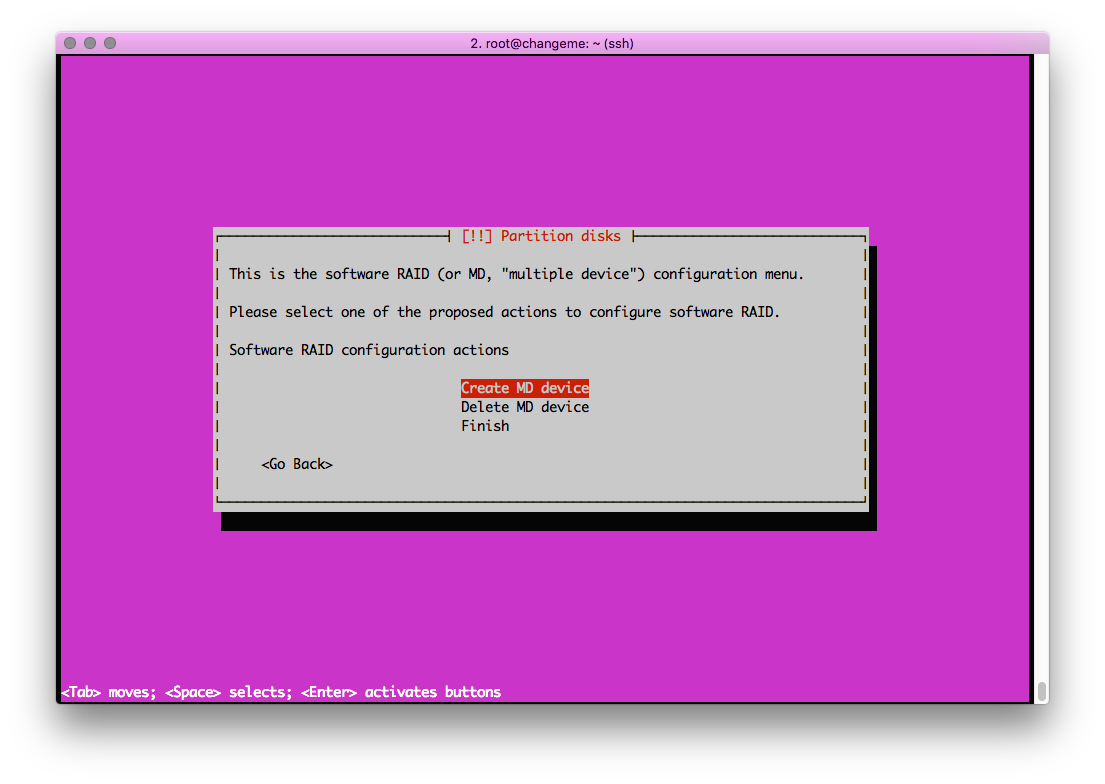
9. Next, we need to create virtual md devices that are, basically, RAID arrays:
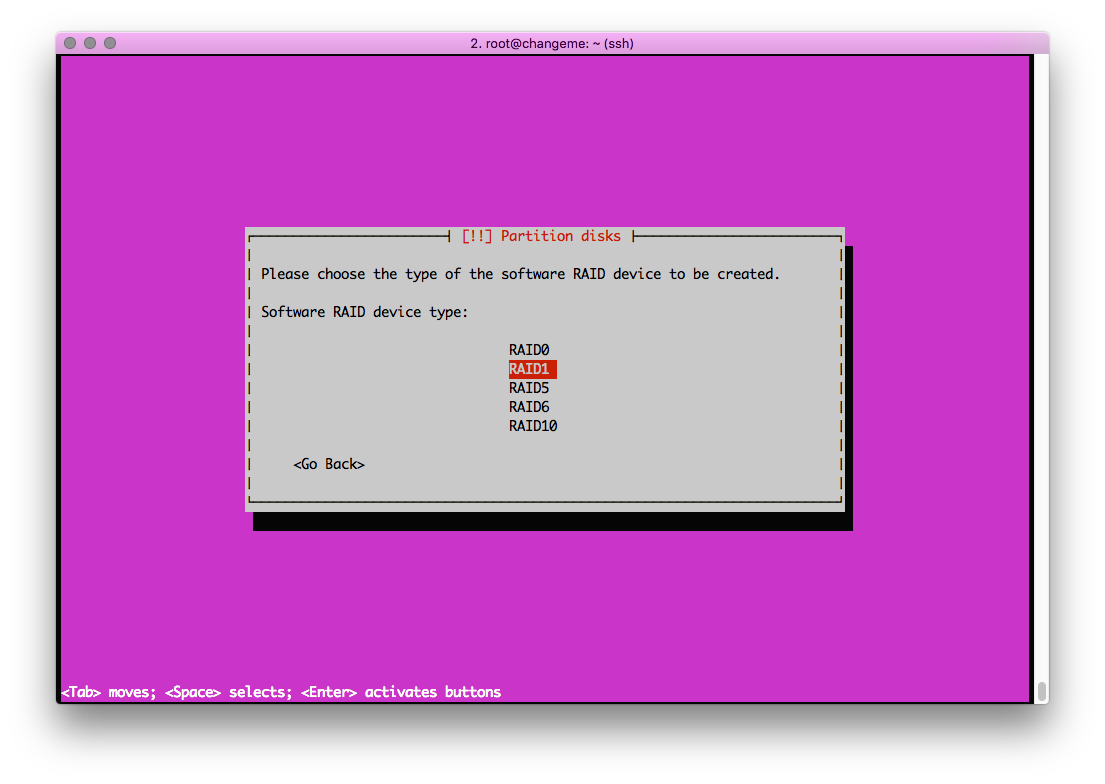
10. Select the level of our RAID -1:
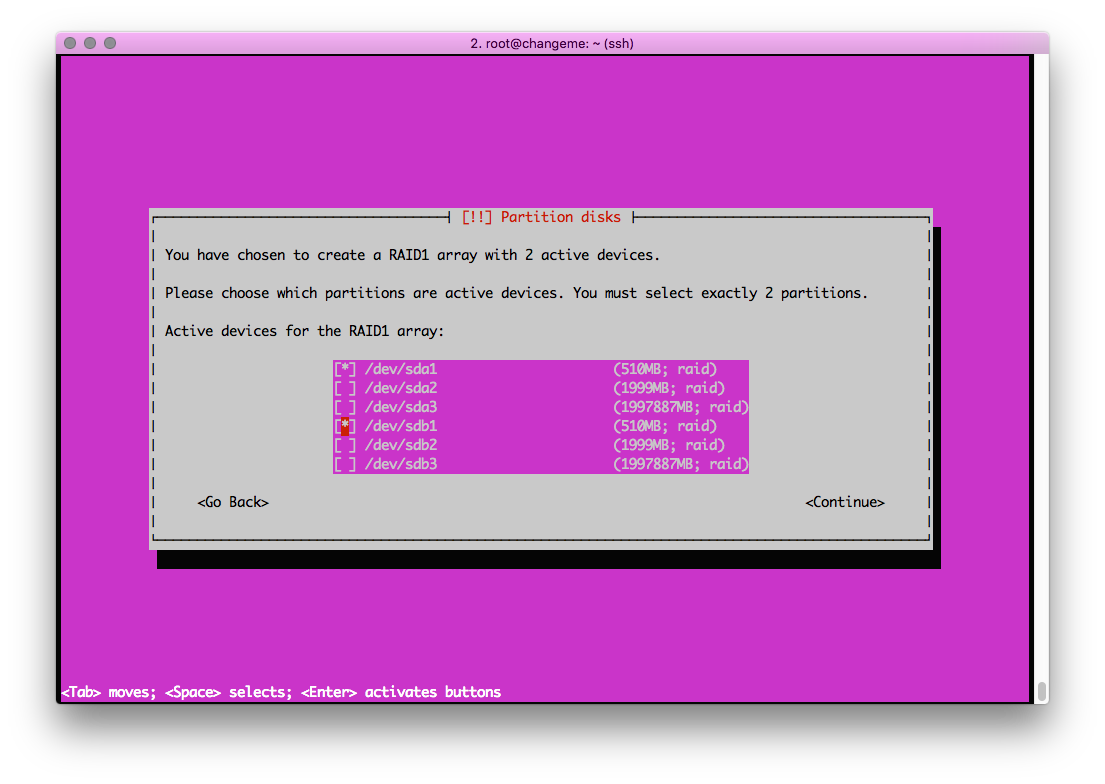
11. Mark the first group of devices that will be mirrored. Do the same for sda2- sdb2, sda3-sdb3. Click Finish:
12. We get 3 RAID md devices:
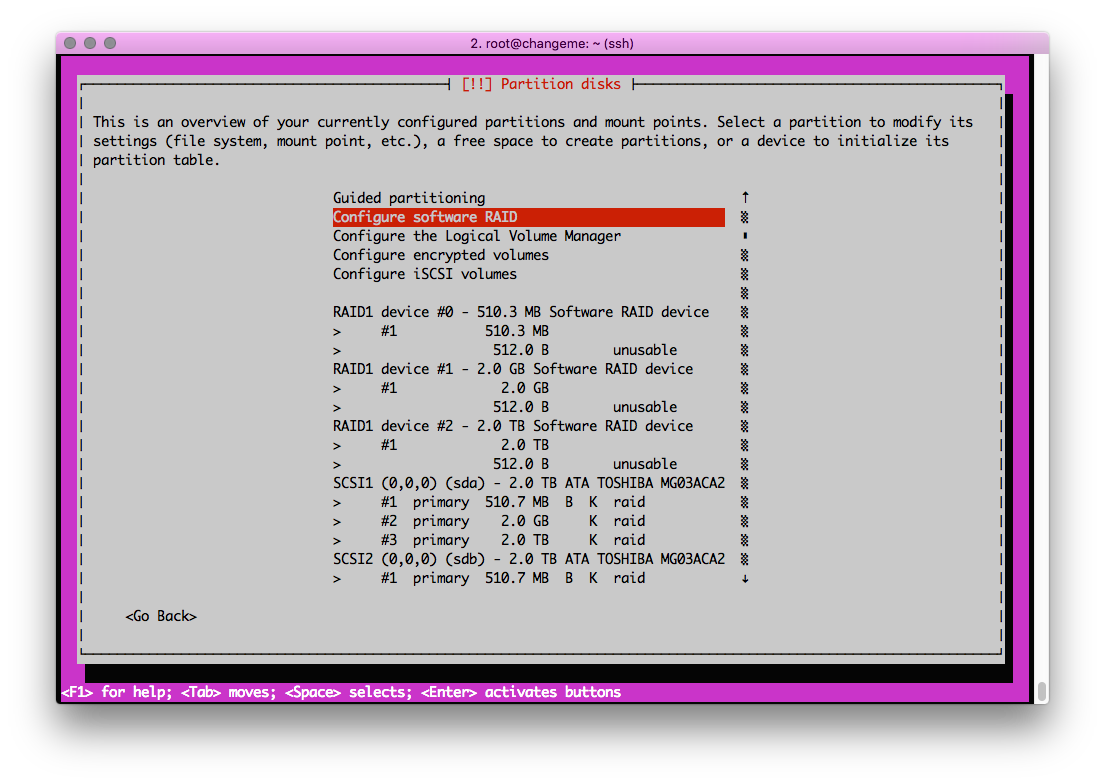
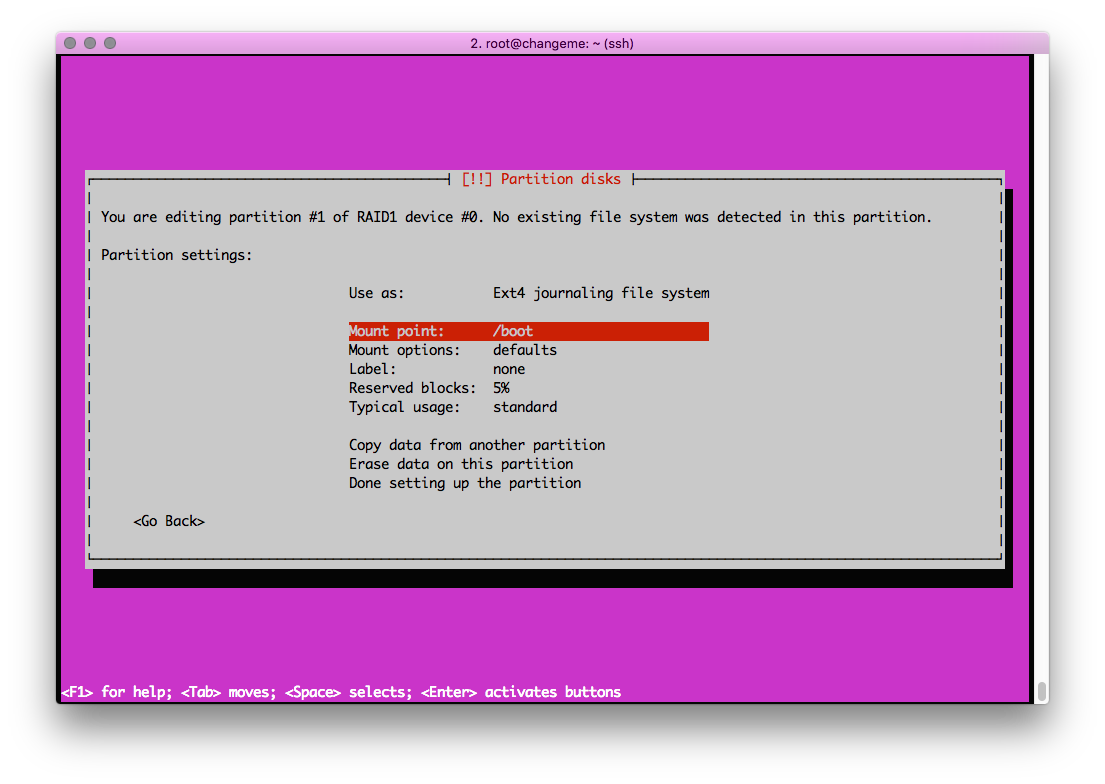
13. Now you must configure them and specify the file system, as well as the mount point for each of them. Finish by clicking "Done setting up the partition":
14. Here is the layout we get:
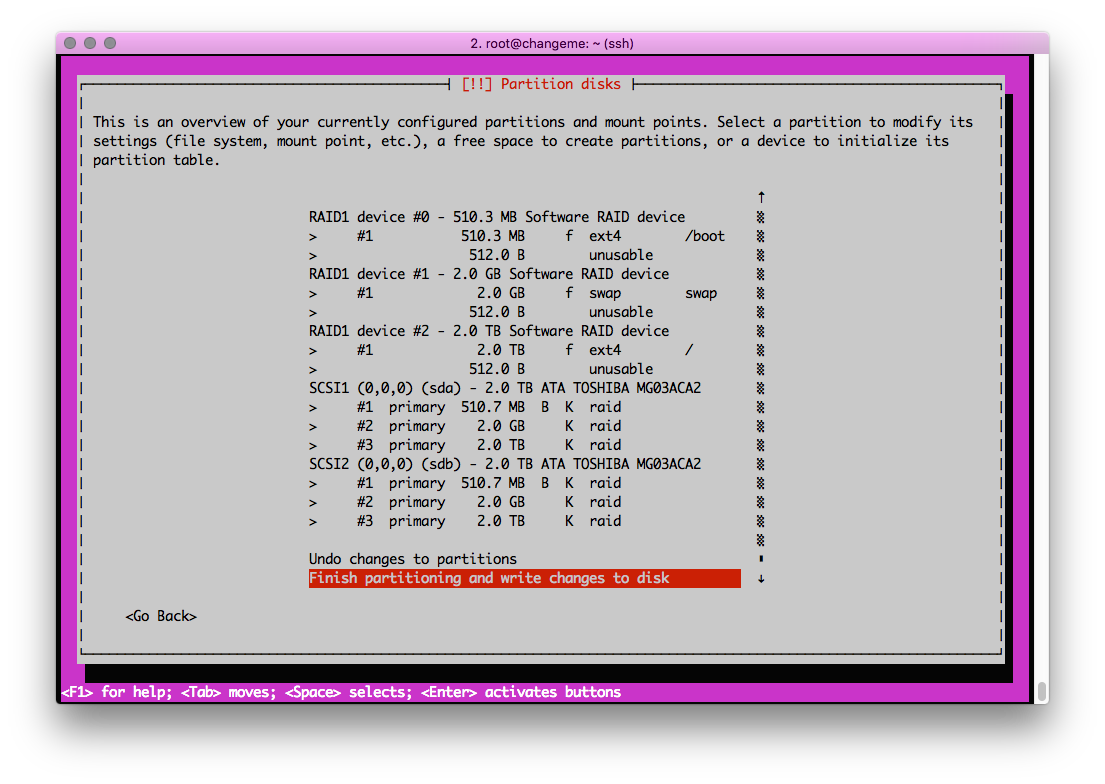
15. Complete the layout and continue installing the OS:
