How to install Zabbix on CentOS 6.8 and Ubuntu 12.04
ZABBIX is a free system for monitoring the status of various services of a computer network, servers and network equipment.
Installing Zabbix 2.4 on CentOS 6.8
This manual assumes that you have already installed LAMP and you only need to install the server part of Zabbix.
Installation is performed by the following commands:
rpm -ivh http://repo.zabbix.com/zabbix/2.4/rhel/6/x86_64/zabbix-release-2.4-1.el6.noarch.rpm
yum install zabbix-server-mysql zabbix-web-mysqlAfter installation, create a database in MySQL and import the necessary tables into it:
shell> mysql -uroot -p<password>
mysql> create database zabbix character set utf8 collate utf8_bin;
mysql> grant all privileges on zabbix.* to zabbix@localhost identified by '<пароль>';
mysql> quit;
shell> cd /usr/share/doc/zabbix-server-mysql-2.4.*/create
shell> mysql -uzabbix -p zabbix < schema.sql
shell> mysql -uzabbix -p zabbix < images.sql
shell> mysql -uzabbix -p zabbix < data.sqlDon't forget to alter the Zabbix configuration file:
# vi /etc/zabbix/zabbix_server.conf
DBHost = localhost # The location where the database is located, where we will connect
DBName = zabbix # Database name
DBUser = zabbix # Database user
DBPassword = zabbix # Database PasswordThe apache configuration file of Zabbix web-interface is located in /etc/httpd/conf.d/zabbix.conf. Some PHP configuration parameters are already provided. You only need to uncomment date.timezone and set the required value.
Php_value max_execution_time 300 # Sets the maximum execution time of php scripts
Php_value memory_limit 128M # Specifies the maximum amount of memory that can be used by the php script.
Php_value post_max_size 16M # Sets the maximum amount of data that can be sent by the POST method.
Php_value upload_max_filesize 2M # Sets the maximum file size that can be uploaded to the server.
Php_value max_input_time 300 # Set the maximum time in seconds, during which the script should parse all input data.
# Php_value date.timezone Europe / Amsterdam # Sets the time zoneAfter completing all the steps, restart the httpd service:
# service httpd configtest #first check the configuration files for errors, then restart
# service httpd restartFor the proper selinux performance, do not forget to run the following command:
setsebool -P httpd_can_network_connect 1Zabbix web-interface is available via a browser at http://YourIpAdress/zabbix. The default username and password are Admin/zabbix.
Installing Zabbix 2.2 on Ubuntu 12.04
Installation is performed by the following commands:
wget http://repo.zabbix.com/zabbix/2.2/ubuntu/pool/main/z/zabbix-release/zabbix-release_2.2-1+precise_all.deb
dpkg -i zabbix-release_2.2-1+precise_all.deb
apt-get update
apt-get install zabbix-server-mysql zabbix-frontend-phpThe apache configuration file of Zabbix web-interface is located in /etc/apache2/conf.d/zabbix. You only need to uncomment date.timezone and set the required value.
Php_value max_execution_time 300 # Sets the maximum execution time of php scripts
Php_value memory_limit 128M # Specifies the maximum amount of memory that can be used by the php script.
Php_value post_max_size 16M # Sets the maximum amount of data that can be sent by the POST method.
Php_value upload_max_filesize 2M # Sets the maximum file size that can be uploaded to the server.
Php_value max_input_time 300 # Set the maximum time in seconds, during which the script should parse all input data.
# Php_value date.timezone Europe / Amsterdam # Sets the time zone
After completing all the steps, restart the apache2 service:
# service apache2 configtest # first check the configuration files for errors, then restart
# service apache2 restartZabbix web-interface is available via a browser at http://YourIpAdress/zabbix. The default username and password are Admin/zabbix.
First launch of Zabbix
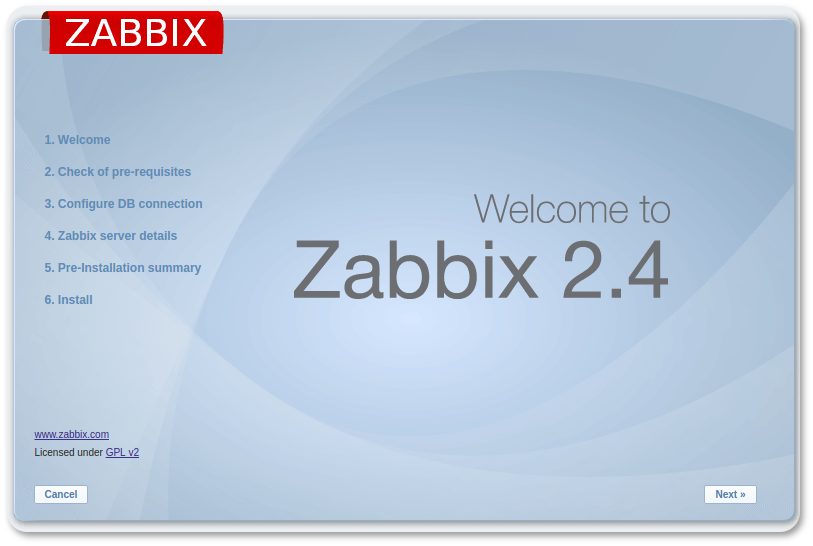
After installation and clicking on the link http://YourIpAdress/zabbix you will see the following welcome message:
After clicking the Next button, we get to the installation requirements verification page:
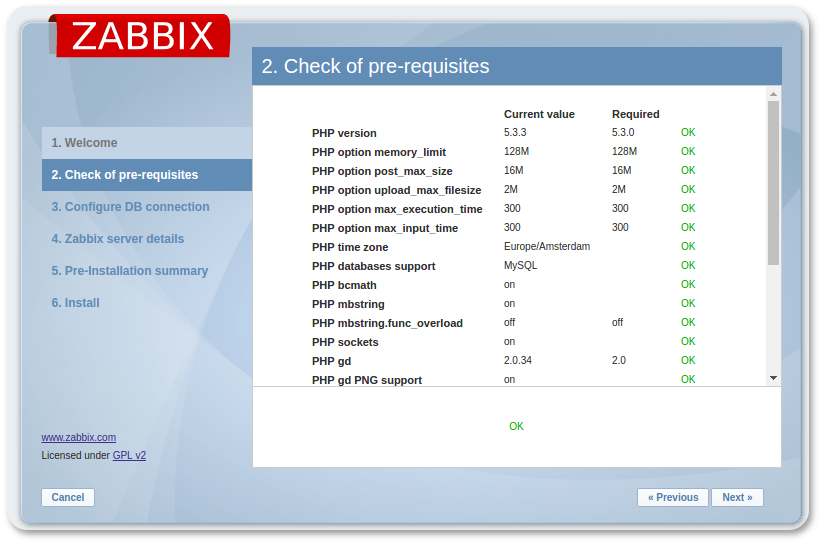
All values must be in the "OK" state. Then, enter the MySQL connection parameters:
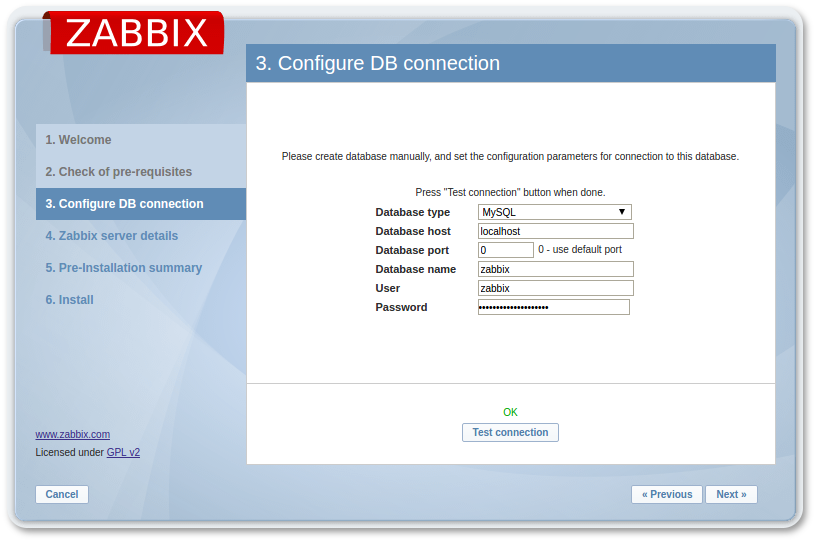
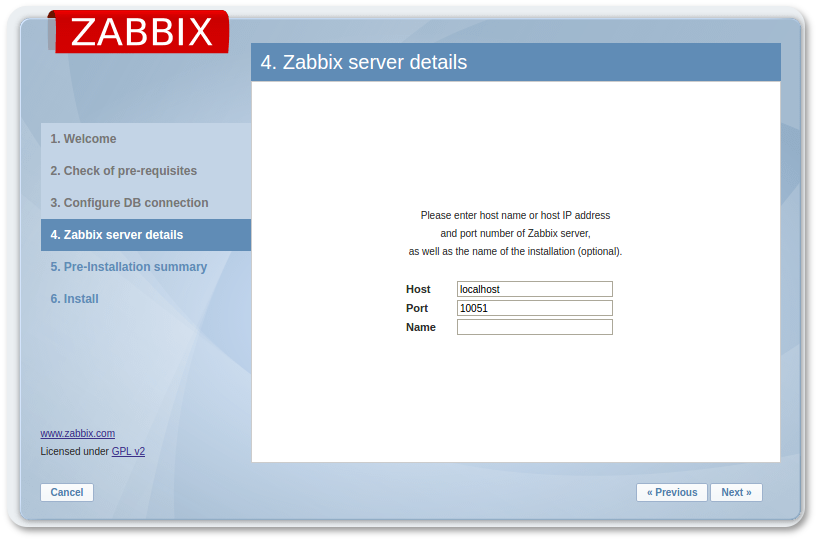
If you configured the Zabbix server on another host, change your Host and Port fields according to your settings. If you left everything by default, then leave everything as it is, as we are connecting to the same server where the web-server is installed.
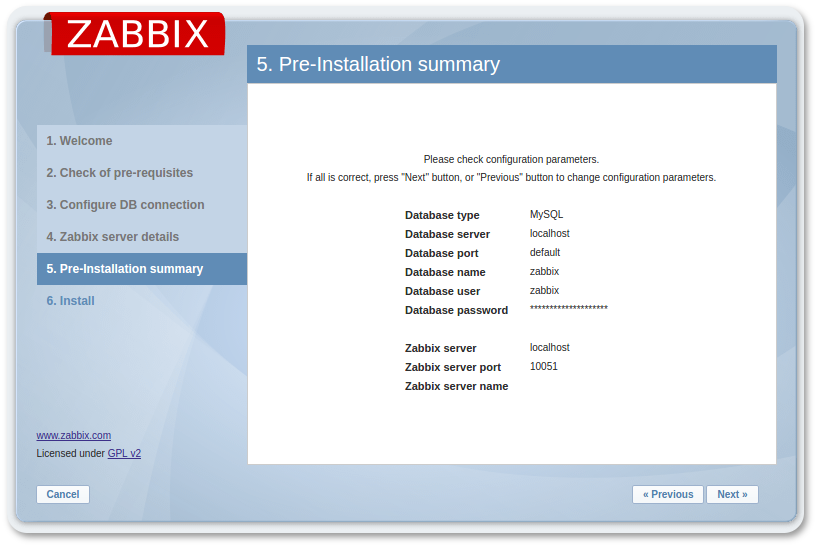
Check the data entered before, and, if everything is fine, move on:
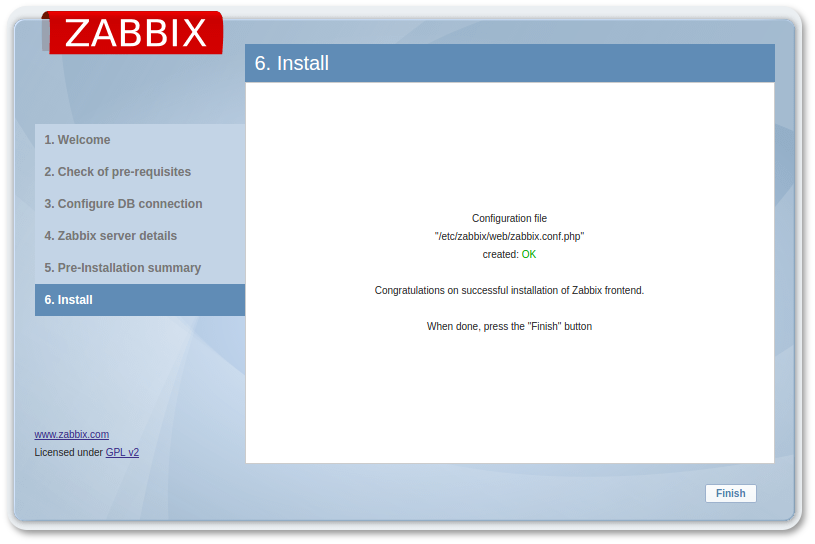
During step 6, we get the message that Zabbix has been successfully installed, and we can finish the installation.
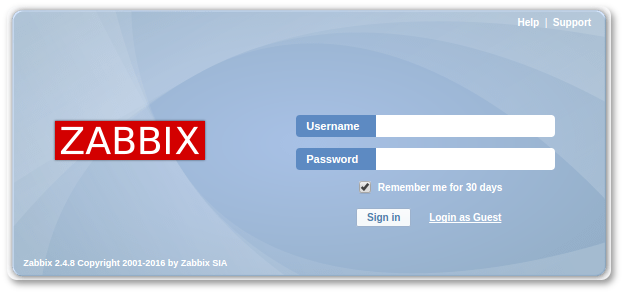
We see the authorization window. The default Zabbix username and password are Admin/zabbix:
Afterwards, we get to the main page of the monitoring server. Thus, Zabbix server installation is completed.
How to install Zabbix on CentOS 6.8 and Ubuntu 12.04
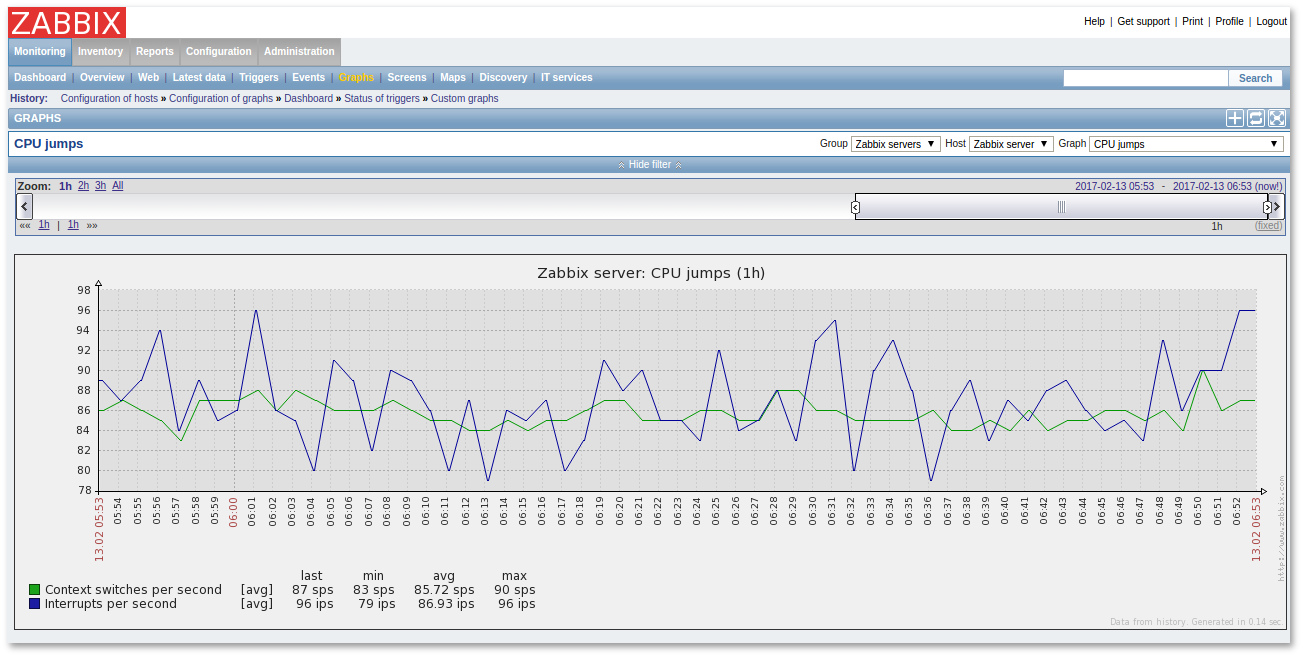
Graphs are added directly via the web-interface:
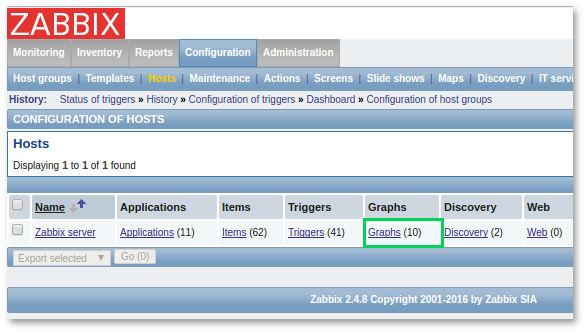
Go to Configuration -> Hosts, choose the required server and press the "Graphs" button.
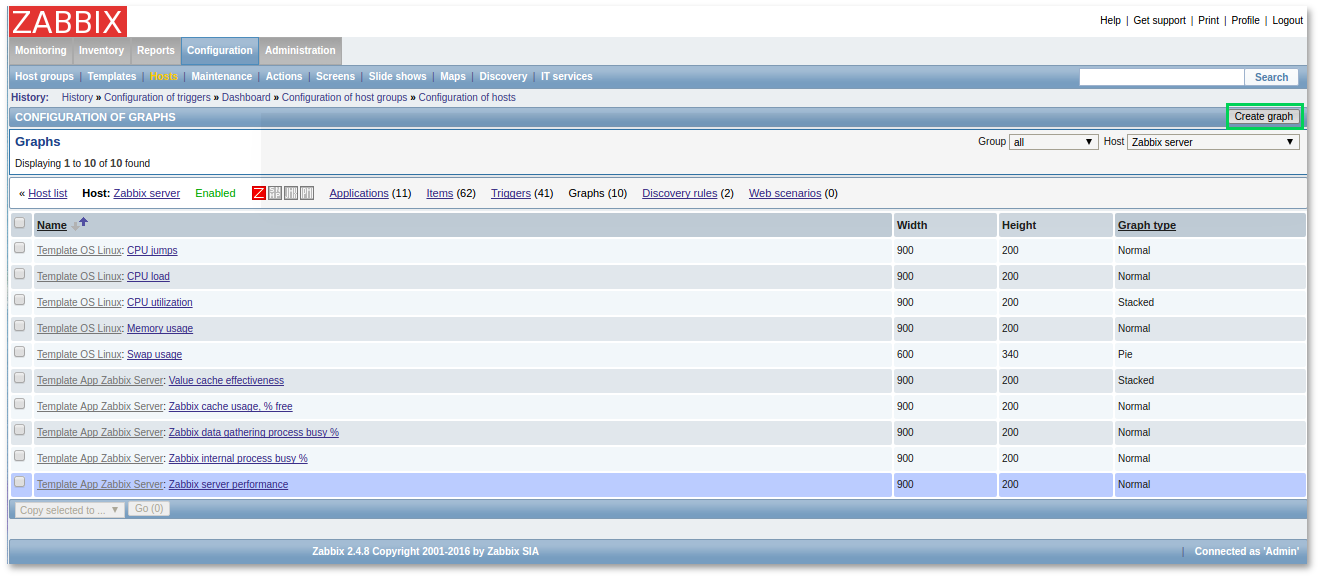
Press the "Create graph" button.
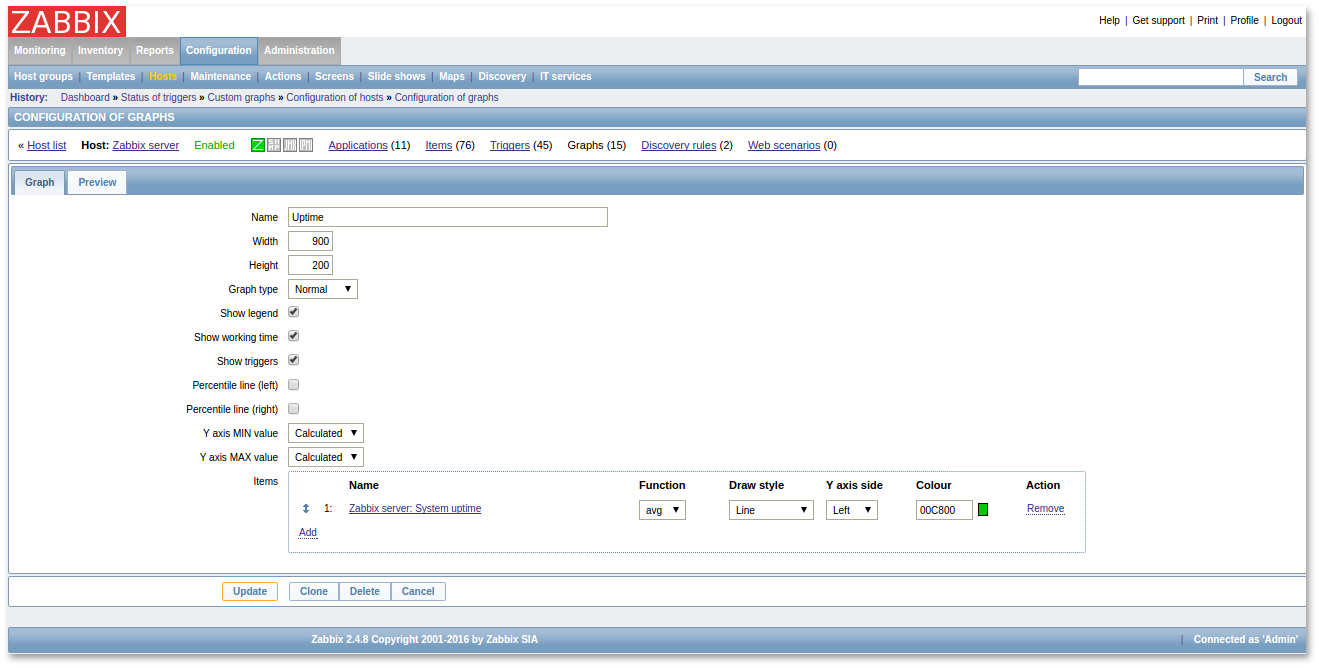
Fill in the required fields:
| Parameter | Description |
| Name | Unique name of the graph |
| Width | Width of the graph in pixels (only for preview and for circular / extended circular graphs). |
| Height | Height of the graph in pixels. |
| Graph type | Graph type: Regular: a regular graph, values are displayed in lines. Stackable: a stackable graph. Circular: a circular graph. Advanced circular: an extended circular graph. |
| Show legend | The graph legend is shown when this option is selected. |
| Show working time | If selected, non-business hours will be displayed in gray. Not available for circular and advanced circular graphs. |
| Show triggers | If selected, simple triggers will be displayed in red. Not available for circular and advanced circular graphs. |
| Percentile line (left) | Displays the percentage line for the left Y axis. If, for example, a 95% percentage line is set, then the line will be displayed on the graph at a ratio of 95% of the values. Available only for normal graphs. |
| Percentile line (right) | Displays the percentage line for the right Y axis. If, for example, a 95% percentage line is set, then the line will be displayed on the graph at a ratio of 95% of the values. Available only for normal graphs. |
| Y axis MIN value | The minimum value of the Y-axis: Calculated – the minimum value of the Y axis will be automatically calculated Fixed – fixed minimum value for the Y axis. Not available for circular and advanced circular graphs. Data item – the last value of the selected data item will be the minimum value |
| 3D view | 3D view Enables 3D style. Only for circular and advanced circular graphs. |
| Items | Data items to be displayed on this graph. |
Choose the attributes to monitor
Attributes of displaying data elements:
| Parameter | Description |
| Sort order (0→100) | Rendering order. 0 will be processed first. Can be used to draw lines or areas behind (or in front of) another.You can drag data items by the arrow at the beginning of the line to set the sorting order or specify which data items are to be displayed on top of the other. |
| Name | Name of the data item to be displayed. |
| Type | Type (available only for circular and advanced circular graphs):PlainSummary graph |
| Function | Items to be displayed when there is more than one value for a data item: all – all (minimum, average, and maximum) min – only minimum. av – only average. max – only maximum |
| Draw style | Rendering style (available only for regular graphs; filling is always used for stackable graphs): Line – draw lines Filling – fill the area Bold line – draw thick lines Dotted line – draw with dotsDashed line – draw with dashes |
| Y axis side | The side to show the Y axis of the indicated element from. |
| Color | RGB color in HEX. |
After all the parameters are entered, press the "Update" button and create a graph.
Go to Monitoring -> Graphs, select the required server and graph: