How to disaggregate network interfaces on a Proxmox server
This instruction guides you through the steps of link disaggregation on a Proxmox server. The process consists of actions performed both on the Proxmox server end and on a switch.
It’s important to start by noting the difference between link aggregation and redundancy.
Link aggregation is a way of uniting network interfaces to merge throughput capacities and to provide fault tolerance if one of the links fails.
Redundancy enables the second network interface via a switch within a public or private network.
In some cases, it's enough just to disable redundancy. The second public or private interface will be switched off via a switch and only one physical port will remain at your disposal. However, an IP address will be still assigned to the aggregated channel.
To do this:
1. Open `/etc/network/interfaces` with a text editor
2. Edit the configuration in accordance with the sample below (settings for disaggregated interfaces):
auto lo
iface lo inet loopback
    dns-nameservers 192.168.8.8 192.168.8.88

auto en_int0
iface en_int0 inet static
    address $Private_IP/29
    post-up /sbin/ip route add 10.0.0.0/8 via $Private_GW dev en_int0
    post-up /sbin/ip route add 192.168.0.0/16 via $Private_GW dev en_int0
    post-up /sbin/ip route add 188.42.208.0/21 via $Private_GW dev en_int0

auto en_ext0
iface en_ext0 inet static
    address $Public_IP/29
gateway $Public_GW-
en_int0 - a name of the internal interface
-
en_ext0 - a name of the external interface
-
$Public_IP - a public IP address
-
$Public_GW - a public gateway
-
$Private_IP - a private IP address
-
$Private_GW - a private gateway for each private subnet
3. Save changes and restart a networking service by performing the command:
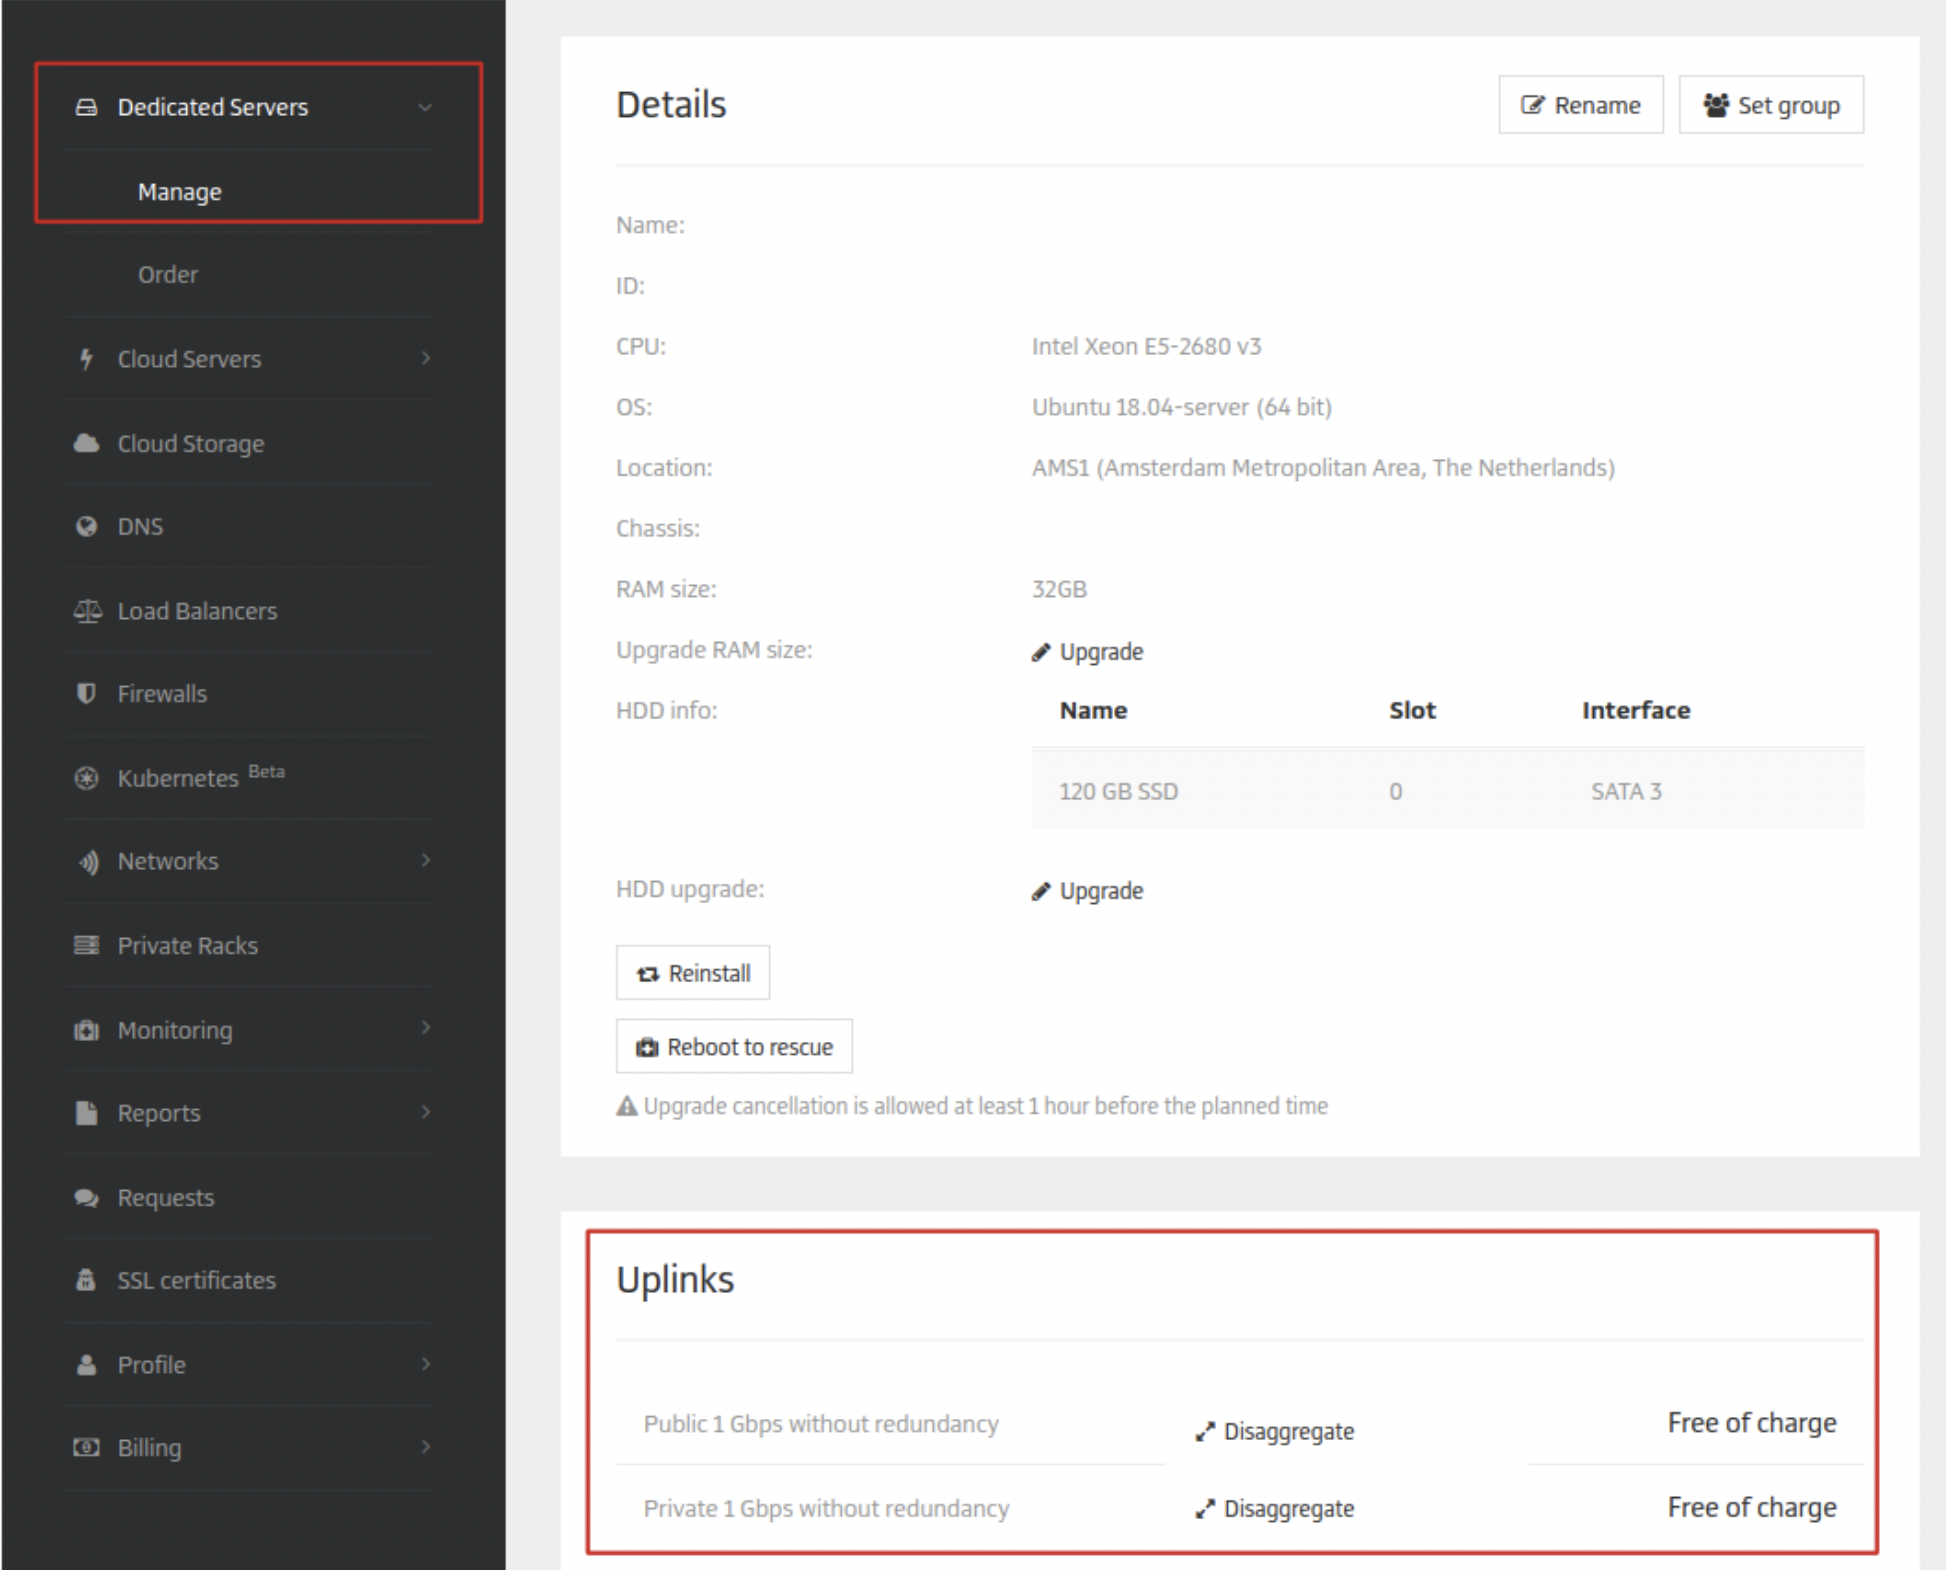
systemctl restart networking.service4. Perform disaggregation in the Customer Portal:
-
Dedicated Servers → Manage
-
Choose a necessary server
-
Go to the Uplink section and click on the Disaggregare button
