How to connect to a Windows server
In this article, we will provide a step-by-step guide for how to connect to a Windows server. We will also provide guidance on how to transfer files between your computer and a remote Windows server.
To start
Before connecting to a Windows server – whether it’s a dedicated server, cloud server or Forex VPS – make sure it is powered on.
You will need to ensure that you have the credentials to access your server. You can find your username and password in the welcome email we sent you during the set-up of your server.
Connecting to a Windows server from Microsoft Windows
You can use the standard Remote Desktop Connection client. This application is pre-installed in any modern Windows system. To connect to your server, you need to do the following:
1. Open the Start menu and type mstsc
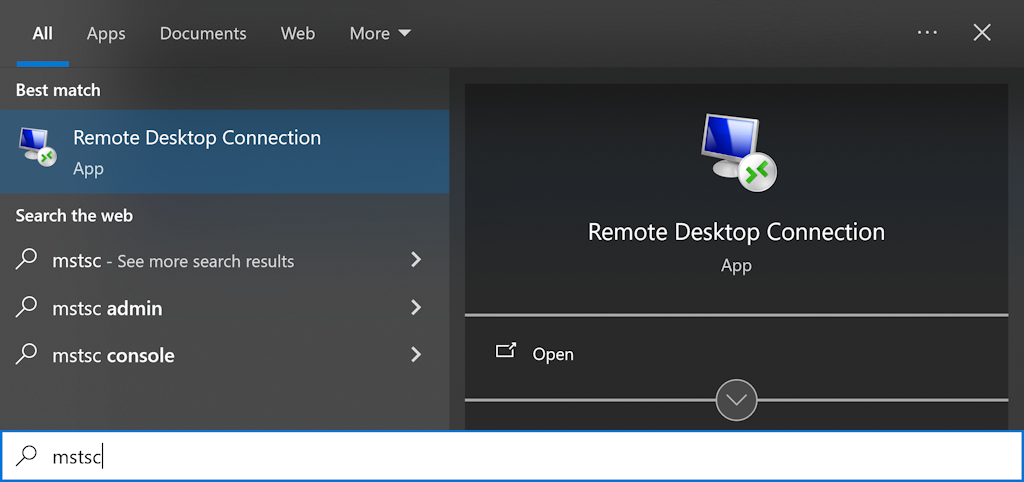
2. The Desktop Connection application will appear in the search results. Click to open
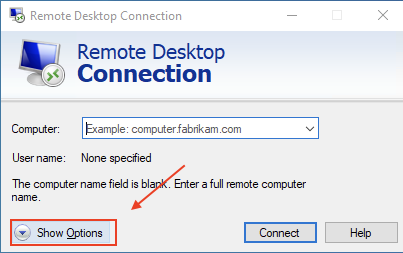
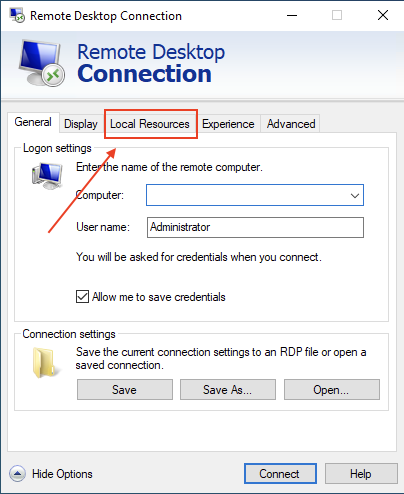
3. Once the app is launched, click Show Options
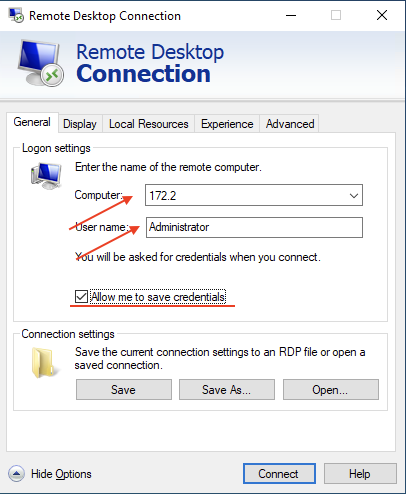
4. On the General tab, type the IP address of your server into the Computer field and a user name into the User name field, and check the Allow me to save credentials box
5. If you want to transfer files between your PC and this Windows server:
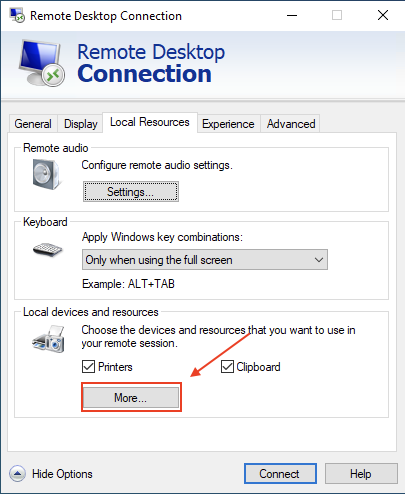
a. Switch to the Local Resources tab
b. Click More
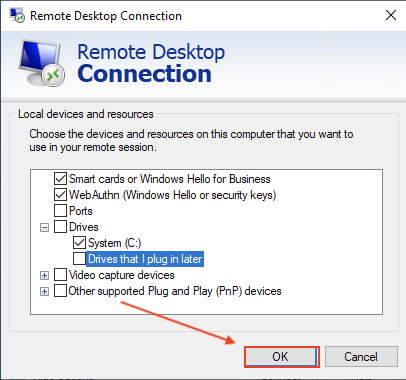
c. Expand Drives and select what drives from your PC should be available on the server
d. Click OK
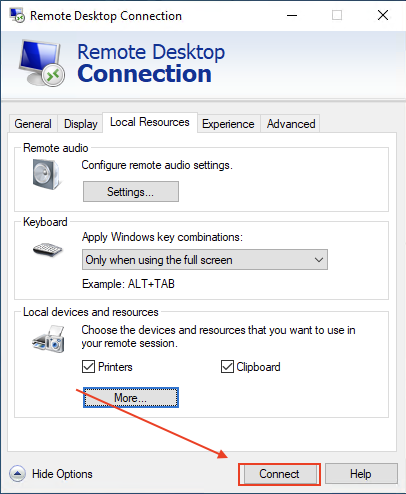
6. Click Connect
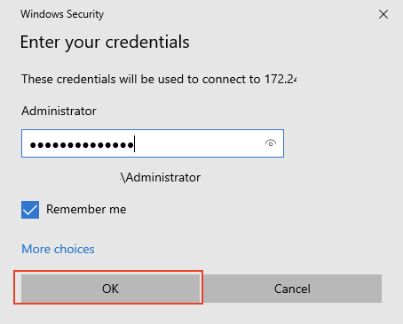
7. A new window will open. Type in the password and click OK
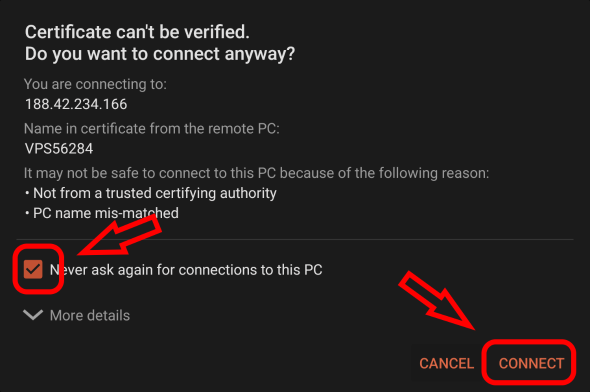
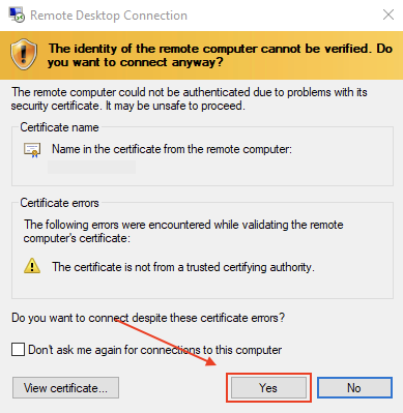
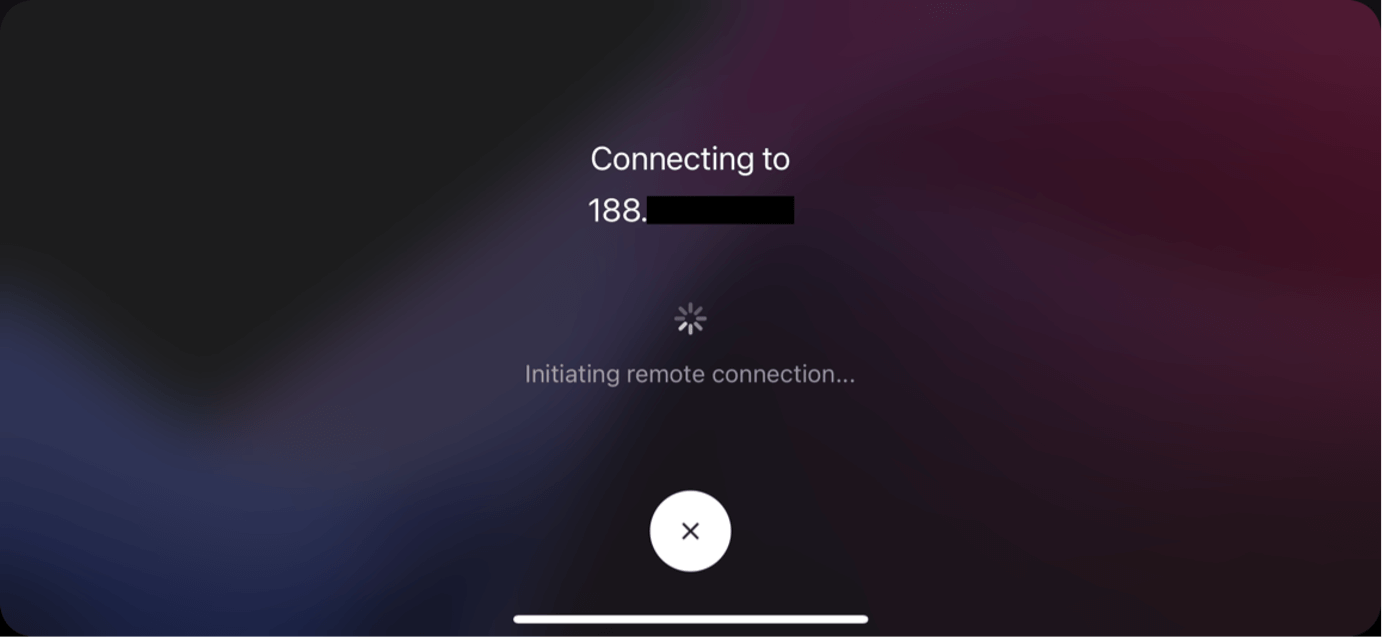
8. Click Yes to accept the certificate and a connection will be established
9. If you chose to share folders between your PC and the server, you will find an additional drive in This PC section in Windows Explorer on the server
Connecting to a Windows server from macOS
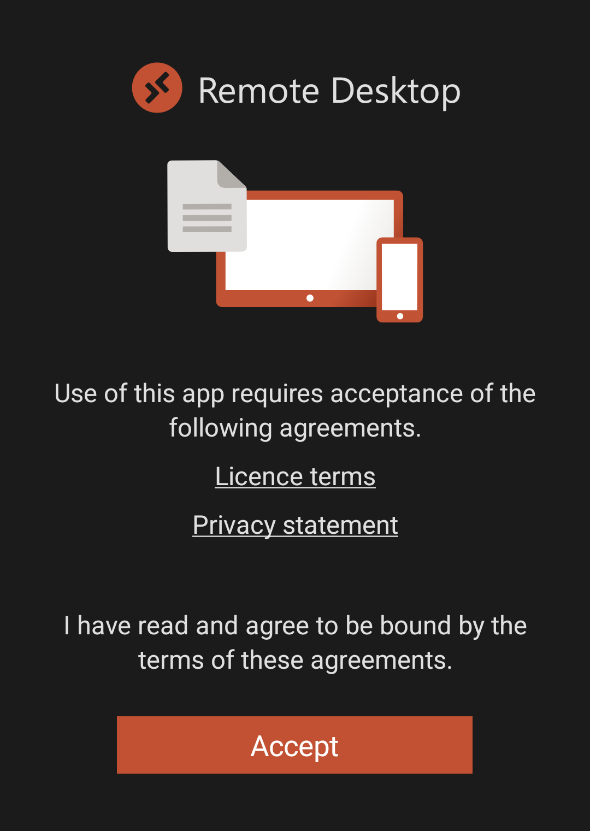
You need to install the official Windows App. You can download it from the Mac App Store.
First, add your server details:
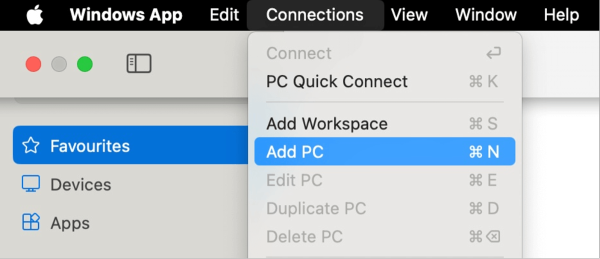
1. In the top menu, click Connections, then Add PC
2. On the General tab:
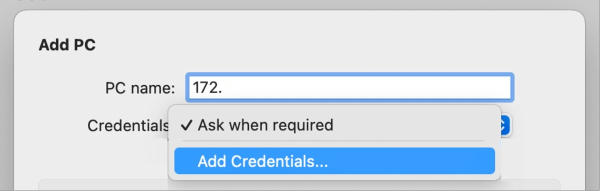
a. Type in the IP address of your server into the PC name field

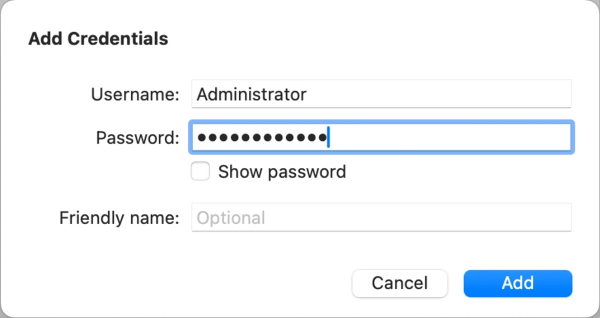
b. In the Credentials drop-down menu, select Add Credentials. A pop-up window will appear
c. In this pop-up window type in the username and password for your server. Click Add
If you want to transfer files between your Mac and this Windows server:
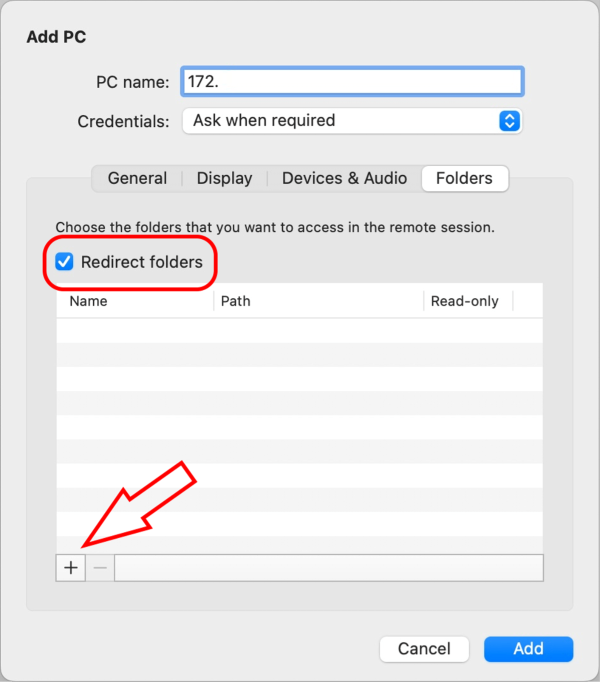
1. Switch to the Folders tab
2. Select the Redirect folders checkbox
3. Click the + sign in the lower left corner
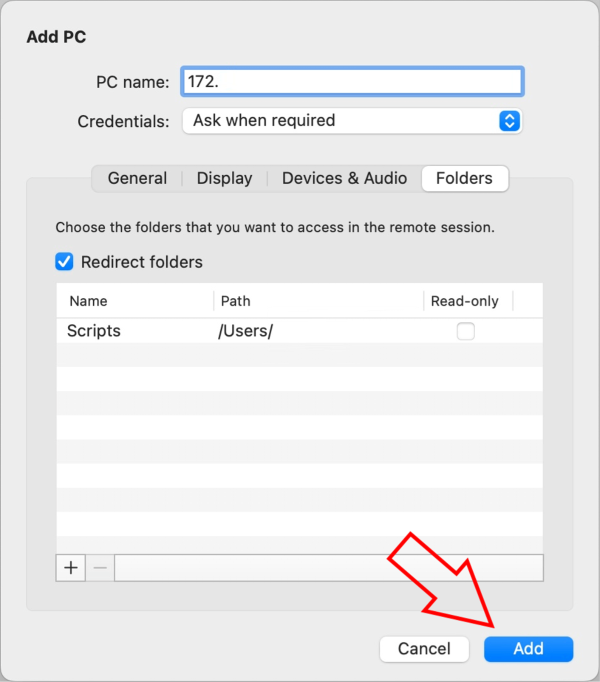
4. Select the folder you want to make available on the server and click Open
5. Repeat for any additional folders
6. Click Add
Now you can connect to the server:
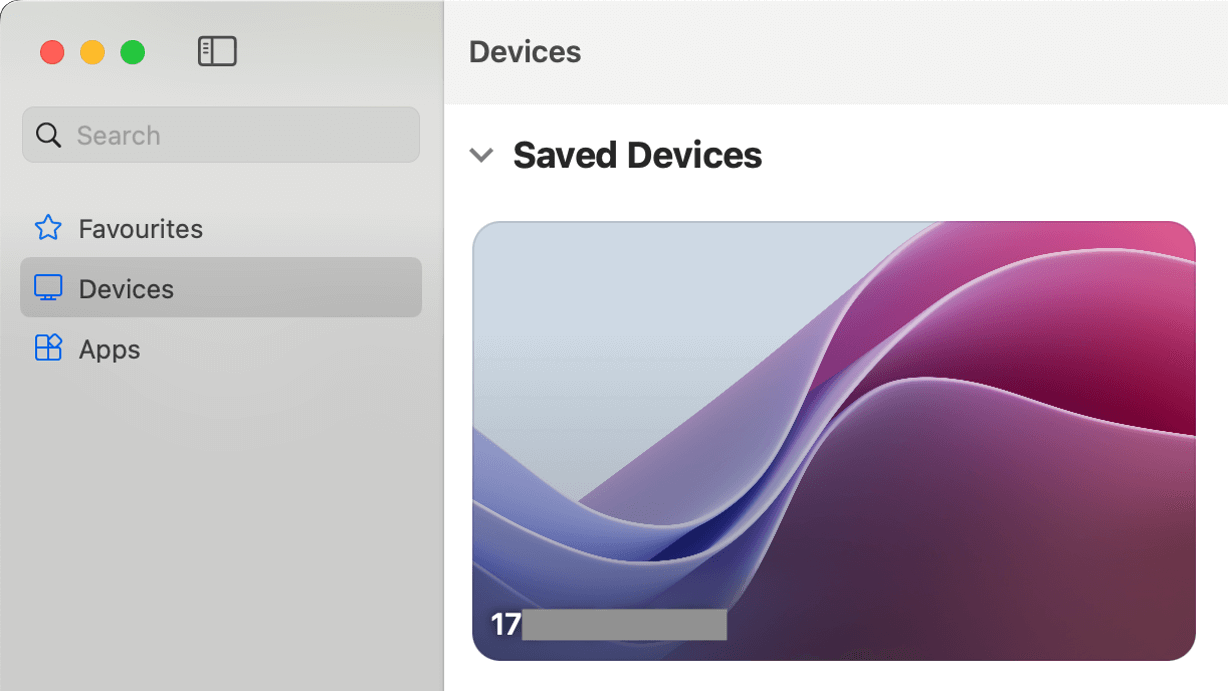
1. On the Devices tab, click this new saved server
2. Click Continue to accept the certificate and a connection will be established

3. If you chose to share folders between your Mac and the server, you will find an additional drive in This PC section in Windows Explorer
Connecting to a Windows server from Linux
There are many RDP clients for Linux but we suggest that you use Remmina.
Install Remmina, launch it, and then:
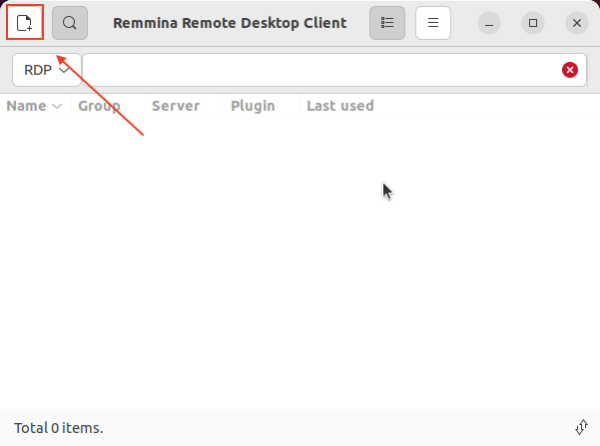
1. Click the new connection button in the top left corner of the screen
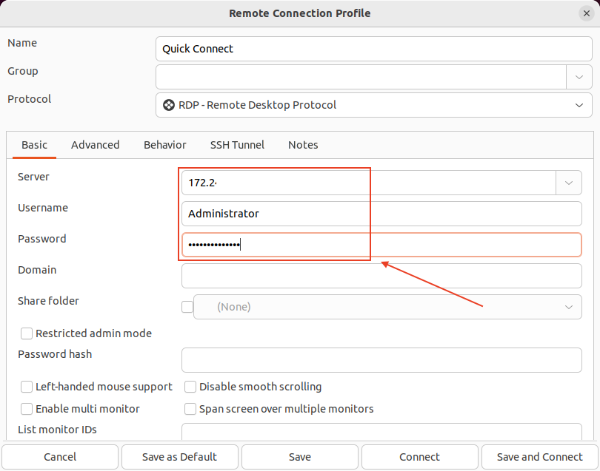
2. In the newly opened window, type your server address into the Server field and the username and password into the Username and Password fields respectively
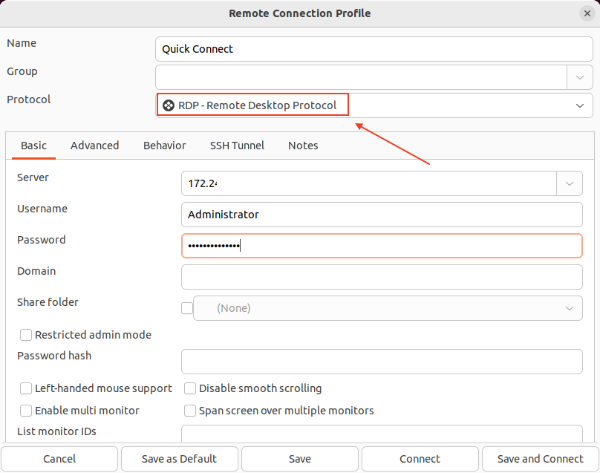
3. In the Protocol drop-down menu, select RDP
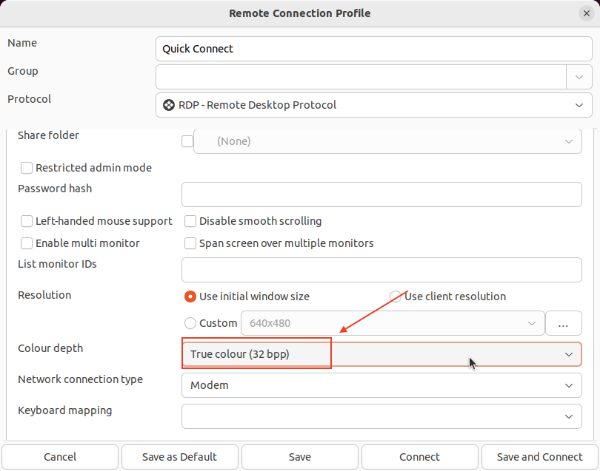
4. Select True color (32 bpp) in the Color depth drop-down menu
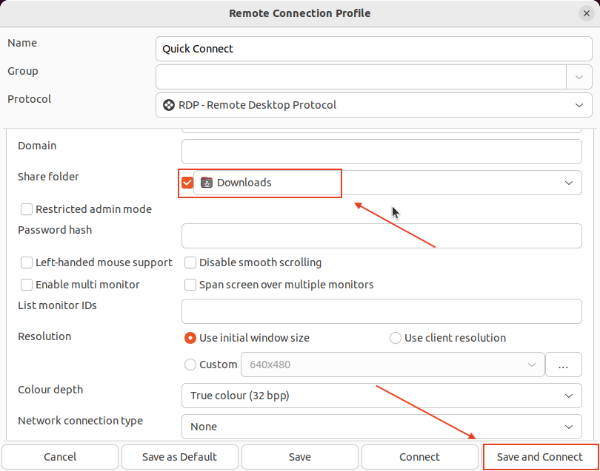
5. If you want to transfer files between your computer and this Windows server:
a. Click the checkbox next to the Share folder label
b. Next, in the drop-down menu to the right, select what folder you want to make available on the Windows server
c. Click the Save and Connect button
6. If you chose to share folders between your computer and the server, you will find an additional drive in This PC section in Windows Explorer
Connecting to a Windows server from iOS (iPhone / iPad)
You need to install the Windows App Mobile app from the App Store.
First, add your server details:
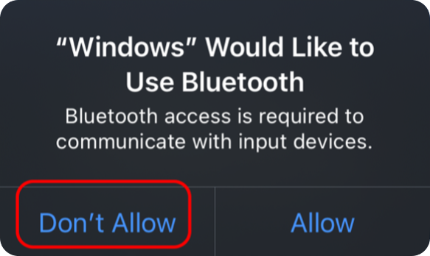
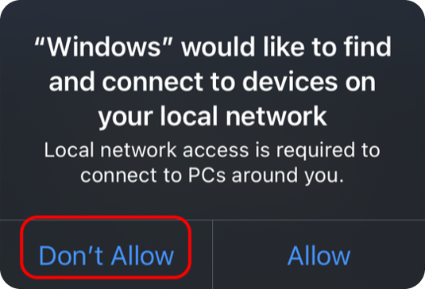
1. When you first open the app, it will request permissions to find devices on your local network and to use Bluetooth. Connection to our servers do not need these features, so you may safely decline
2. Skip the welcome screen

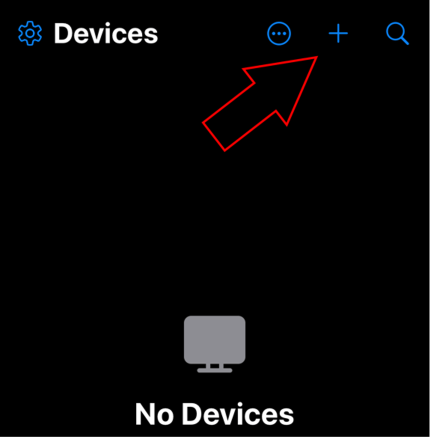
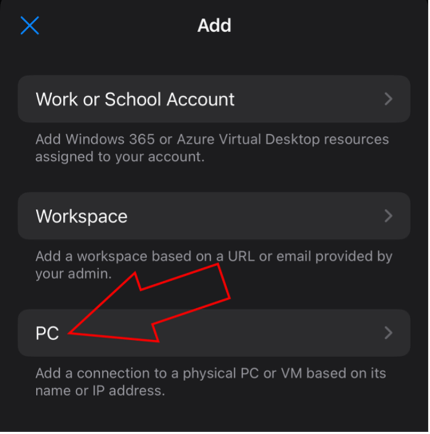
3. Tap the + sign at the top of the screen
4. Select PC
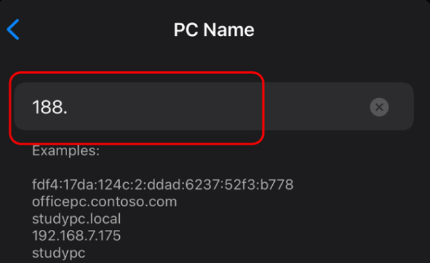
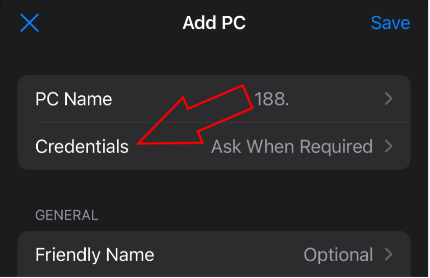
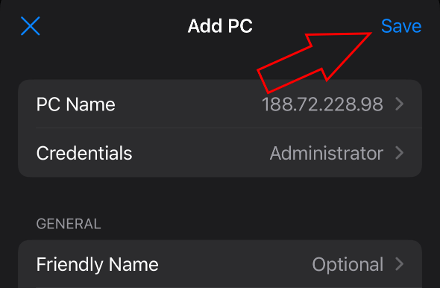
5. Tap PC Name, on the next screen type in the address of your server. Return to the previous screen by tapping <
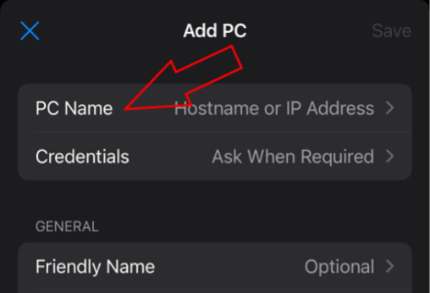
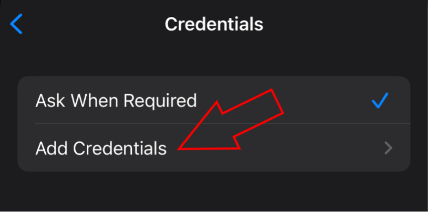
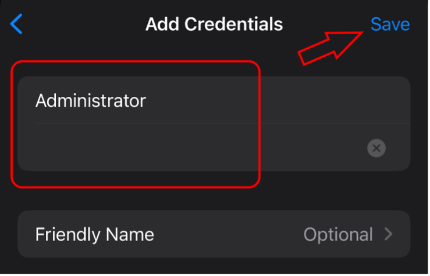
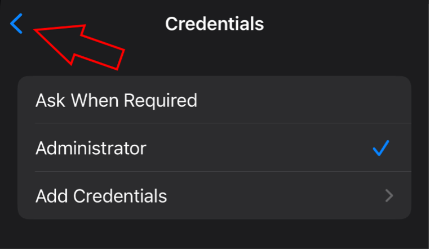
6. Tap Credentials then Add Credentials. Enter the credentials and tap Save. Return to the previous screen
7. Tap Save again
Now you can connect to this server:
1. Rotate your device sideways
2. On the Devices tab, tap the card of your server and the app will connect to it

Connecting to a Windows server from an Android device
Microsoft has released an official Remote Desktop app for Android. You can download and install in from Google Play.
First, add your server details:
1. When you first open the app, you are presented with a license agreement. Accept it to proceed further
2. Tap the + sign in the top right corner and select Add PC
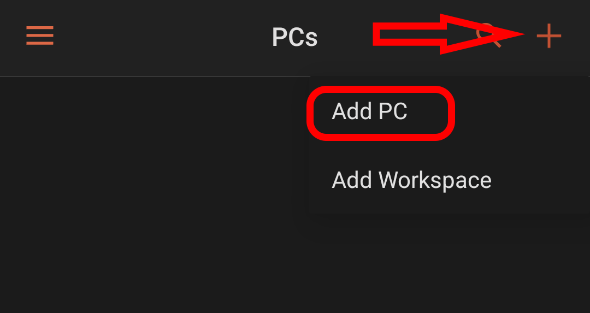
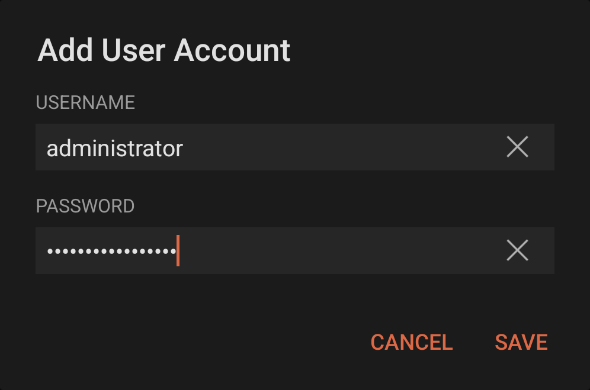
3. In the PC NAME field, type in the address of your server. Under USER ACCOUNT, select Add user account and type in your server credentials
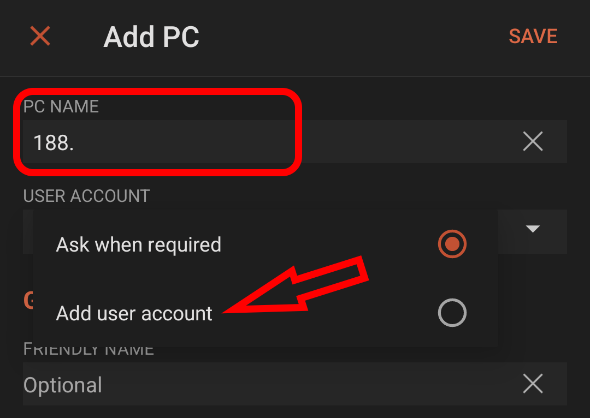
4. Tap SAVE twice
Now you can connect to this server:
1. Rotate your device sideways
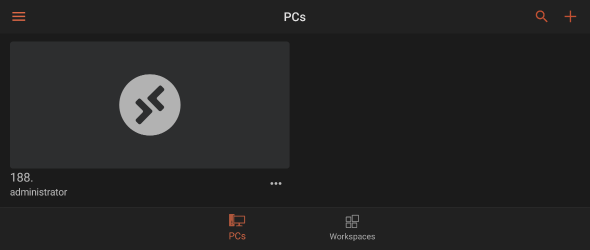
2. On the PCs tab, tap the card of your server
3. The app will request to send you notifications. There’s no need for that so you can safely decline that request
4. On the certificate verification pop-up, check the Never ask again box and tap CONNECT