How to boot a server into a custom ISO image using iDRAC
- Enabling the Virtual Media feature in iDRAC
- Using a local ISO image as Virtual Media
- Using an ISO file on a remote file share as a Virtual Media
Your Dell server's out-of-band management (OOB) platform is called iDRAC. It's a piece of dedicated hardware on the server's motherboard, allowing system administrators to access the server's console remotely and attach virtual media.
iDRAC provides remote console and virtual media capabilities even when your server's OS fails to boot, or there is no OS installed at all. Please refer to "How to access the out-of-band management interface of a Dell server called iDRAC" for instructions on how to access iDRAC of your server.
The Virtual Media feature of iDRAC allows system administrators to boot their servers into custom ISO images located on an SMB share or an administrator's workstation.
Enabling the Virtual Media feature in iDRAC
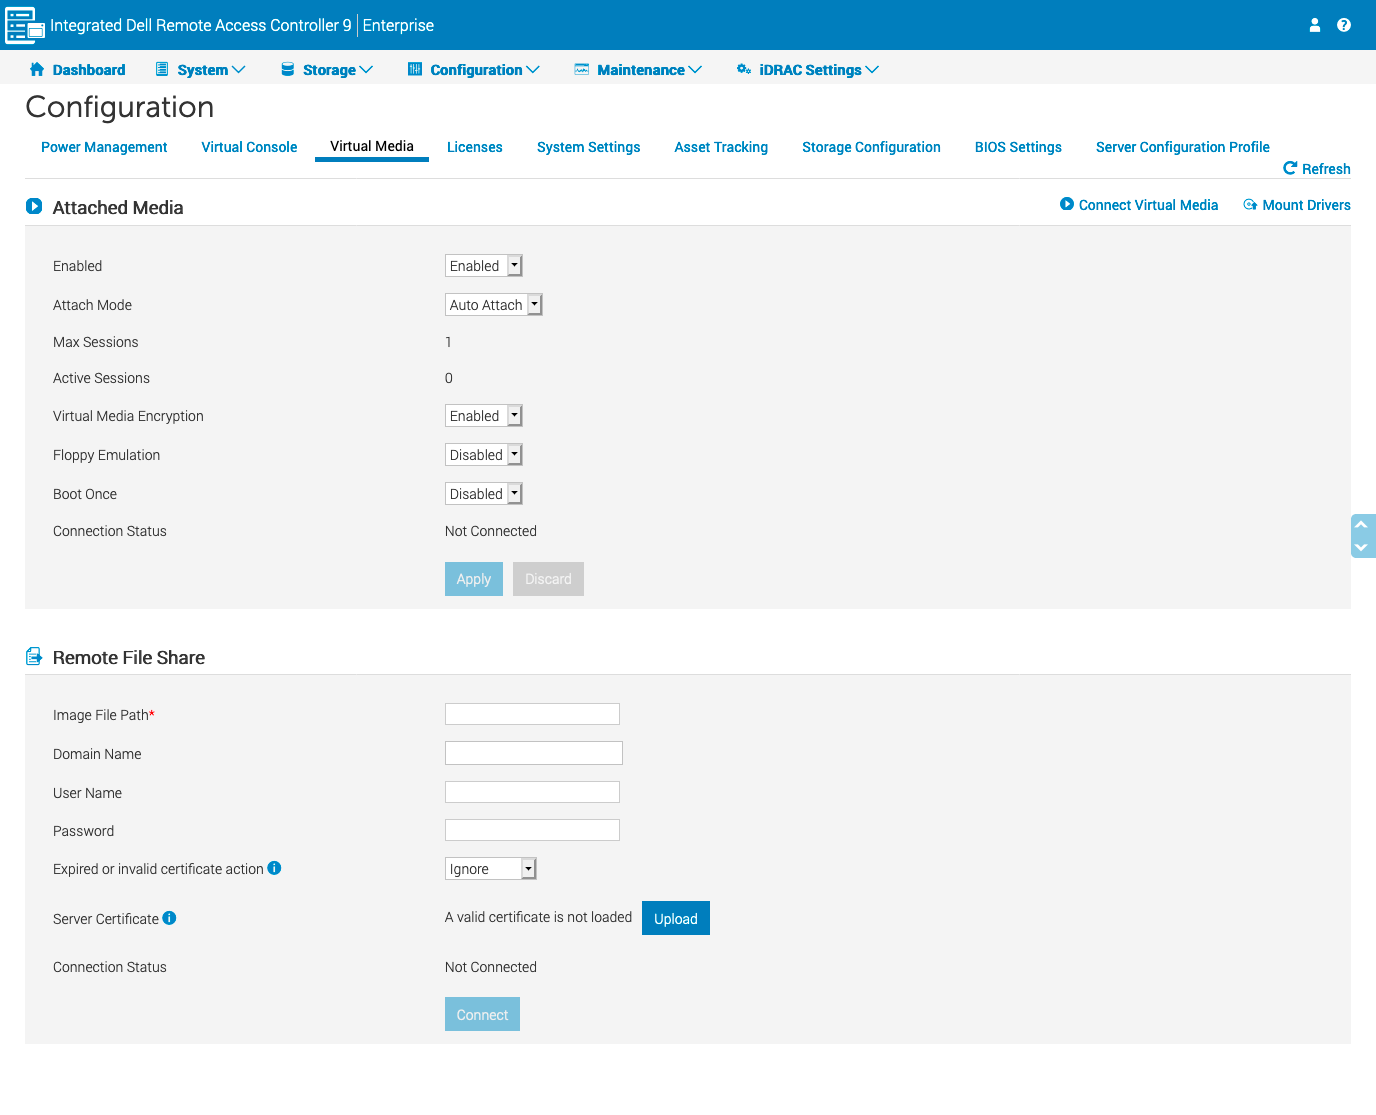
You may need to enable the Virtual Media feature in the Configuration section of iDRAC web interface. To do so, navigate to Configuration → Virtual Media and set the "Enabled" property value to "Enabled":

Using a local ISO image as Virtual Media
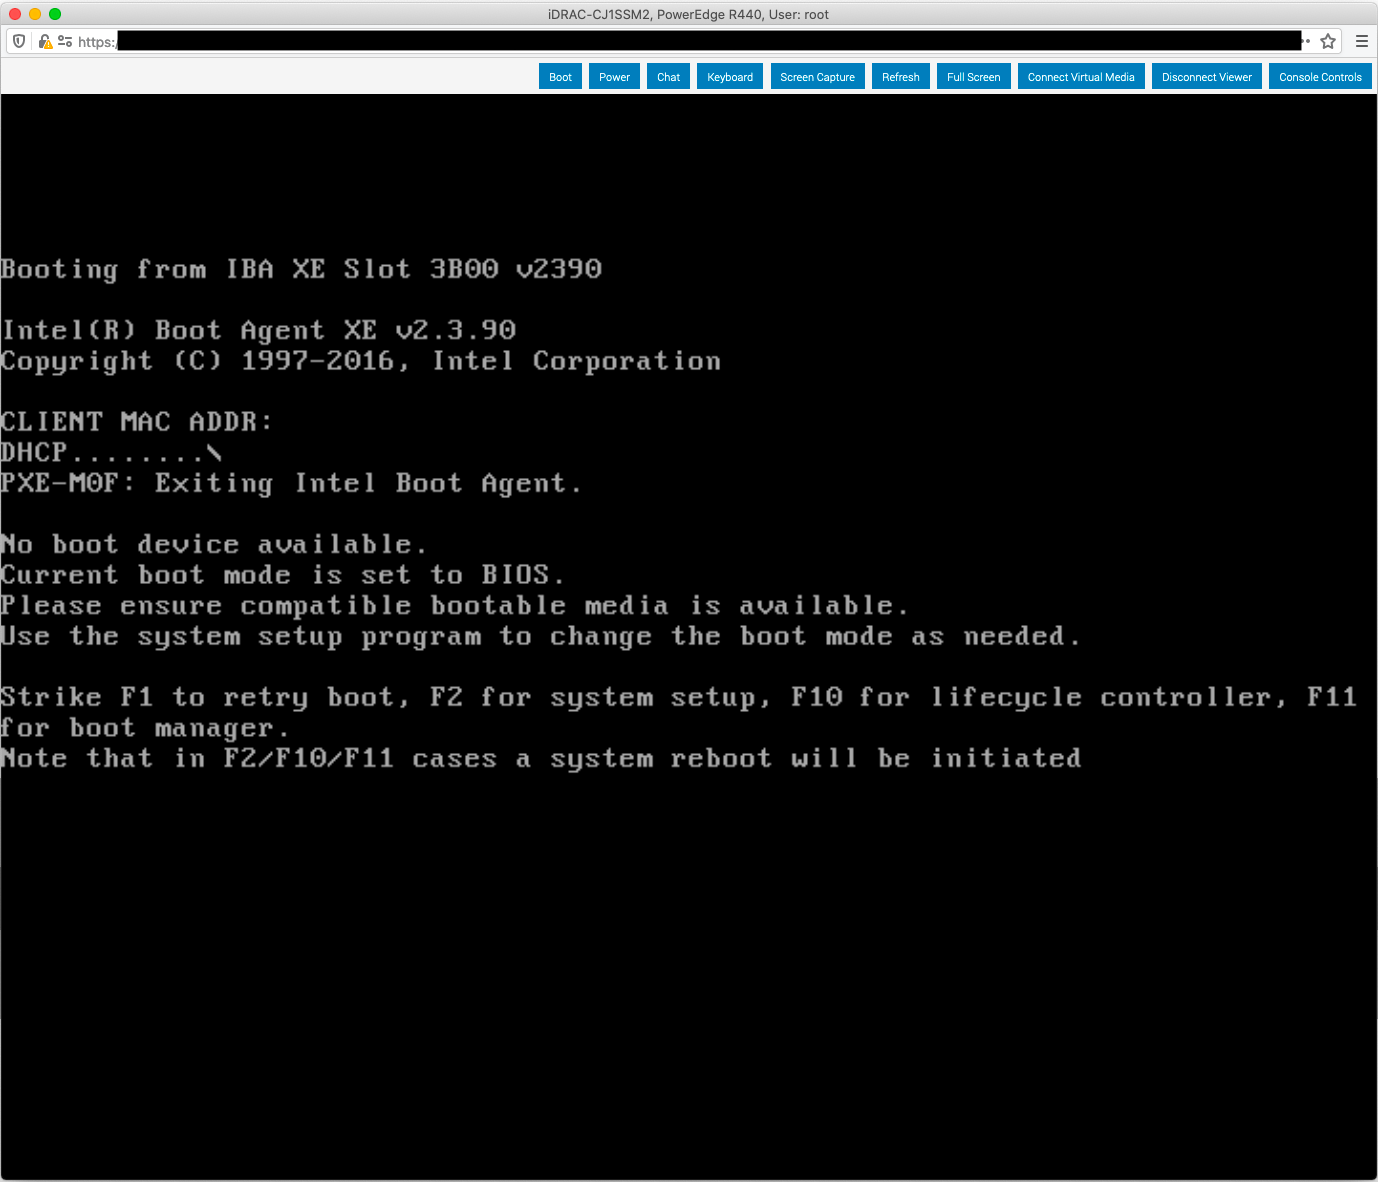
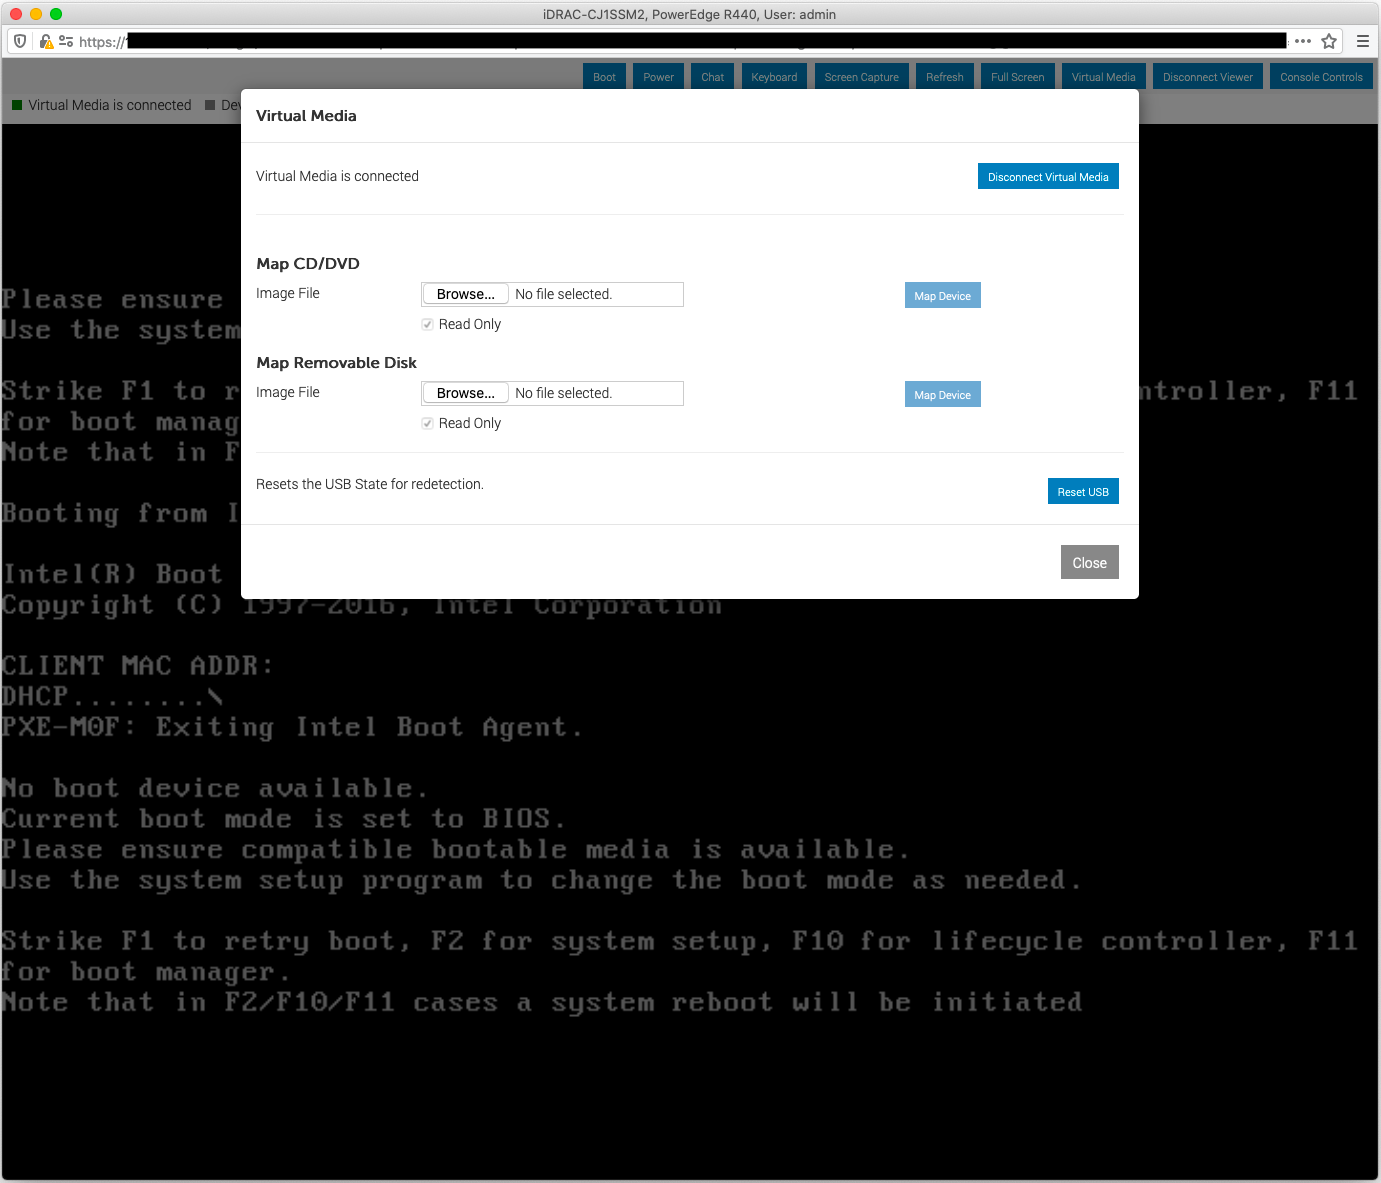
You can use an ISO image located on your workstation as virtual media on the server. To do that, you need to launch Virtual Console within iDRAC and click Connect Virtual Media:

You will be asked to select a file:

Press F11 during startup to select the boot device or F2 to set boot order through BIOS.
Documentation references
Please refer to the following articles for additional instructions. Instructions depend on the version of iDRAC on your server (how to identify the iDRAC version).
iDRAC 7/8/9
-
Using the Virtual Media function on iDRAC6, iDRAC7, iDRAC8 and iDRAC9
-
How to install the operating system on a Dell PowerEdge Server?
iDRAC 9
iDRAC 7/8
Please use your server's service tag to search Dell's Support Site for user guides for other versions of iDRAC.
Using an ISO file on a remote file share as a Virtual Media
You can use an ISO image located on a remote file share as virtual media on the server. Depending on the version, iDRAC on your server supports CIFS (SMB) shares or CIFS (SMB) and HTTP/HTTPS.
Use an IPv4 host address in the Image File Path field as iDRAC can't resolve DNS hostnames.
Please note that the OOB network connecting your bare-metal servers is separated from the private network and the Internet. As such, your server's iDRAC can't access any remote file shares by default. You should turn the "Enable public access for 24 hours" feature to allow your server's iDRAC to access external networks.
Use "Enable public access for 24 hours" to allow iDRAC access file shares via the Internet.
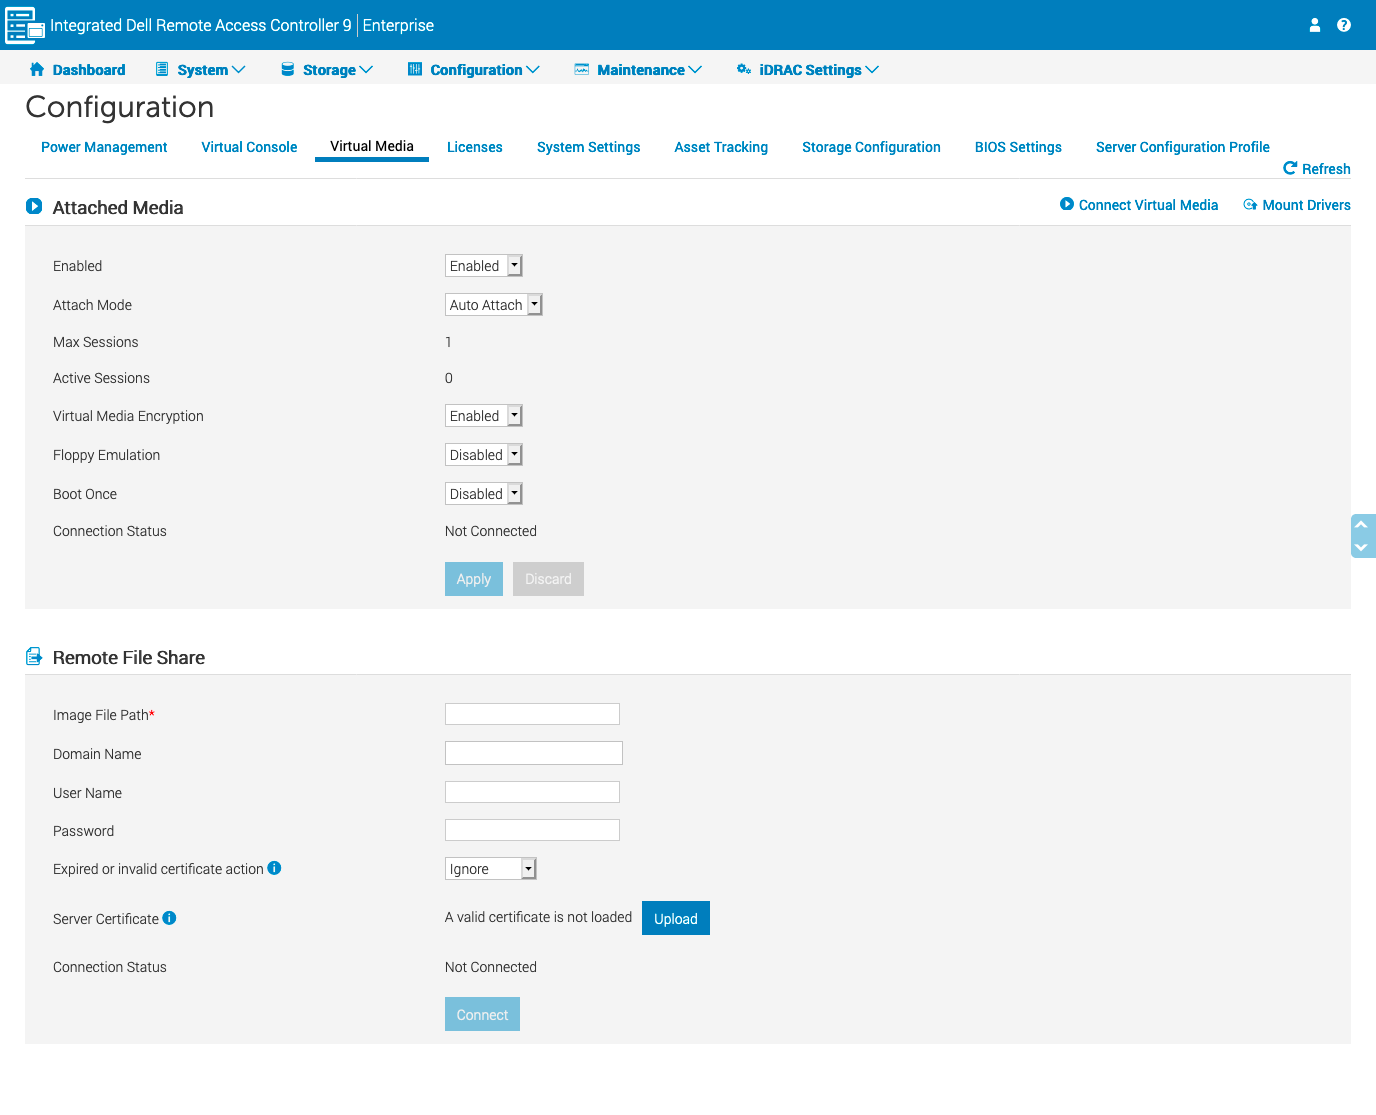
You can set up the remote file share in the Virtual Media configuration section:

After connecting the image, press F11 during startup to select the boot device or F2 to set boot order through BIOS.
Documentation references
Please refer to the following articles for additional instructions depending on the version of iDRAC on your server (how to identify the iDRAC version).