
Setting up Windows built-in VPN client
To set up a new VPN connection:
1. Open VPN settings
Press Win + R, type ms-settings:network-vpn and press Enter.
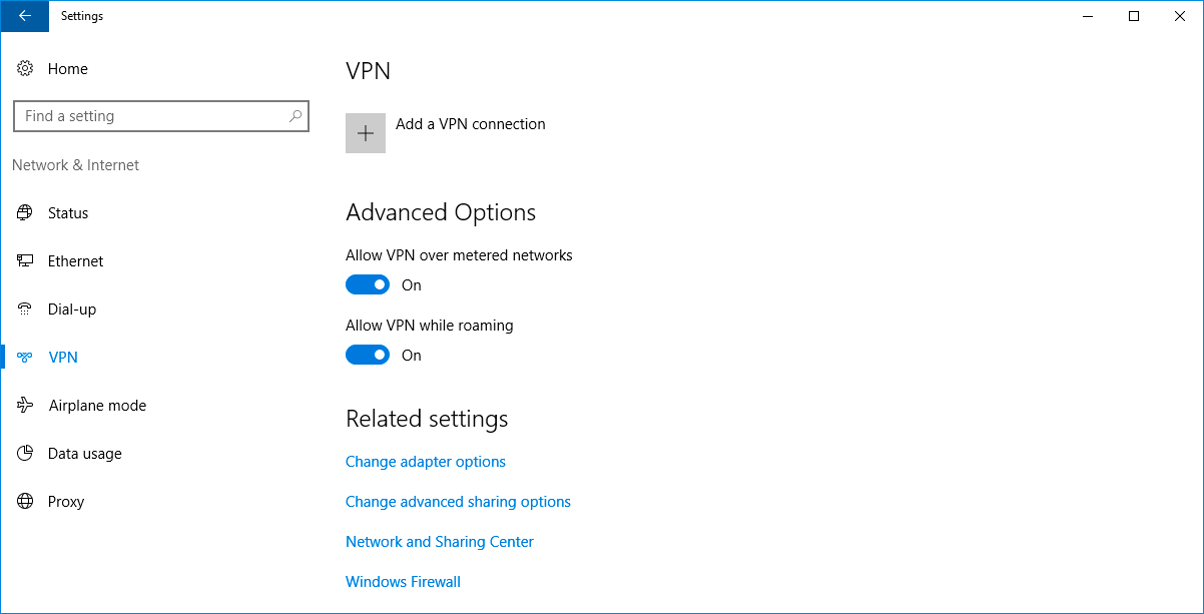
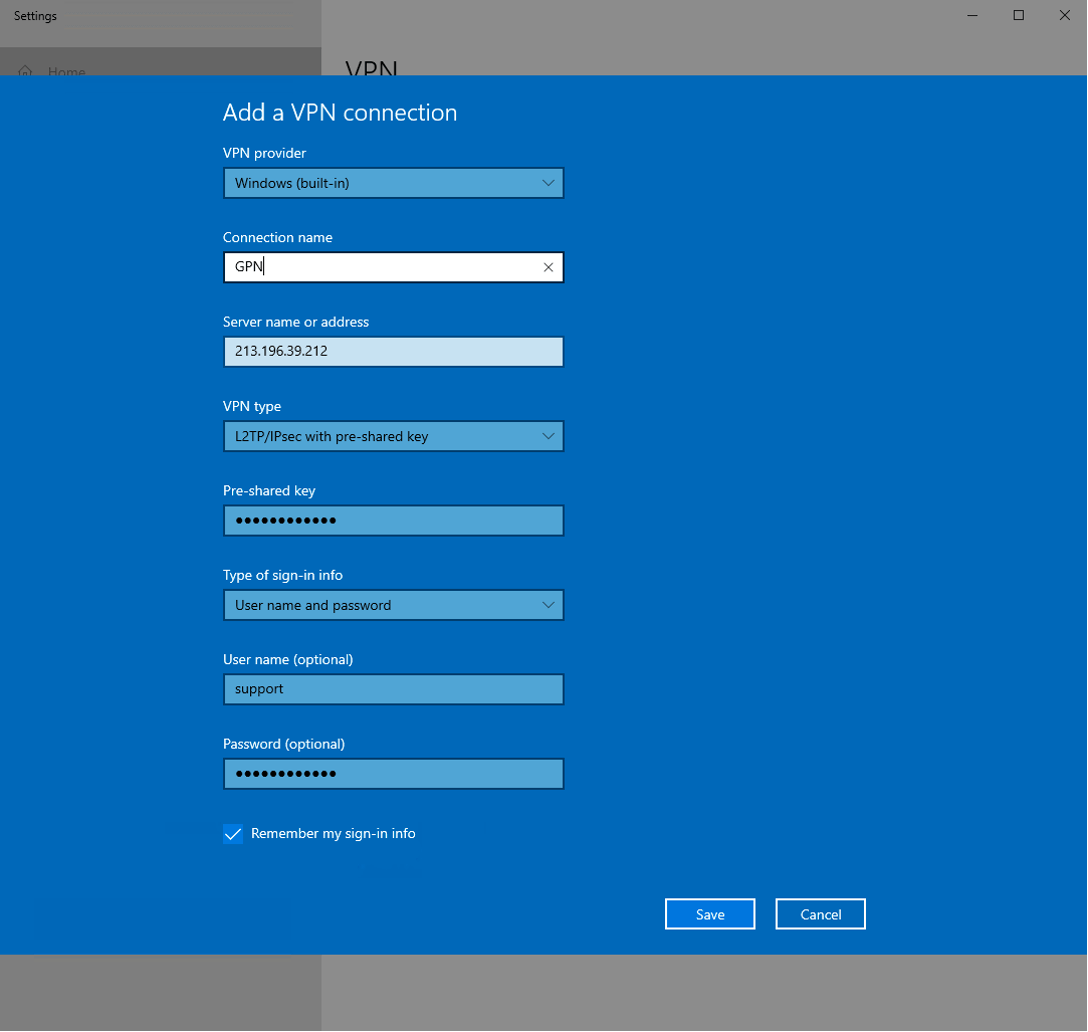
2. Click Add a VPN connection
-
Set the VPN provider to Windows (built-in)
-
Set the Connection name to GPN
-
Set the VPN type to L2TP/IPsec with pre-shared key
Fill the rest of the fields with the data obtained in the user credentials dialogue:
-
Server name or address: VPN server
-
Pre-shared key: Shared secret
-
User name: Login
-
Password: Password
Click Save
3. Open Windows PowerShell
Click Start (or press Win), type PowerShell, and then click Windows PowerShell.
4. Run the following command to check connection properties:
Get-VpnConnection -Name "GPN" -erroraction 'silentlycontinue'; Get-VpnConnection -AllUserConnection -Name "GPN" -erroraction 'silentlycontinue'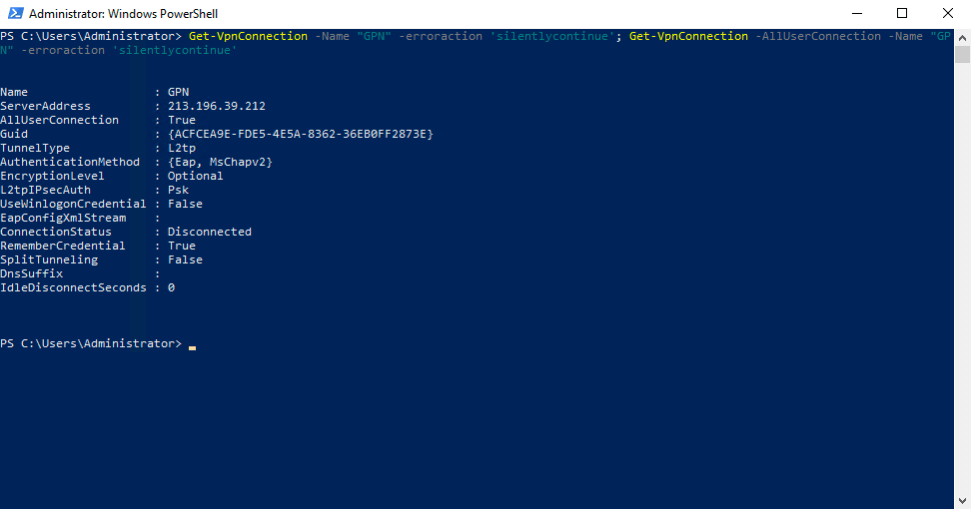
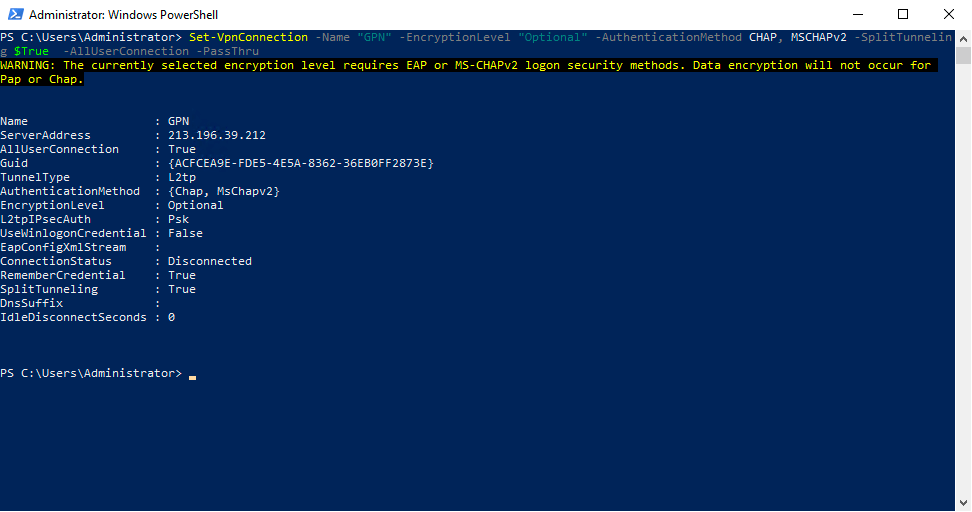
5. Check the ‘AllUserConnection’ property in the output of the previous command. It indicates whether the VPN connection is in the global (machine) or local (user) phone book. If the property reads ‘True’, run:
Set-VpnConnection -Name "GPN" -EncryptionLevel "Optional" -AuthenticationMethod CHAP, MSCHAPv2 -SplitTunneling $True -AllUserConnection -PassThruOtherwise run:
Set-VpnConnection -Name "GPN" -EncryptionLevel "Optional" -AuthenticationMethod CHAP, MSCHAPv2 -SplitTunneling $True -PassThruThe command configures additional parameters like ‘AuthenticationMethod’ and ‘SplitTunneling’.
The first version of the command includes the ‘-AllUserConnection’ parameter which indicates that the VPN connection specified is in the global phone book.
6. Finally, add the route for the VPN connection by running:
Add-VpnConnectionRoute -ConnectionName "GPN" -DestinationPrefix "10.0.0.0/8"You can now connect to the VPN by:
-
Choosing GPN and clicking Connect next to it in the VPN section of Windows Settings (Win + R,
ms-settings:network-vpn→ Enter) -
Clicking the network icon in the system tray, choosing GPN and clicking Connect next to it
-
Running ‘rasdial GPN’ in a PowerShell window
Troubleshooting
While setting up VPN2GPN on a personal computer with the Windows operating system you may encounter an error saying the following:
The L2TP connection attempt failed because the security layer encountered a processing error during initial negotiations with the remote computer
To fix it:
1. Open the command prompt in Windows as an administrator
2. Enter the command below in the Windows console and run it
Set-VpnConnectionIPsecConfiguration -ConnectionName "GPN" -AuthenticationTransformConstants SHA196 -CipherTransformConstants AES256 -EncryptionMethod AES256 -IntegrityCheckMethod SHA256 -PfsGroup None -DHGroup Group14 -PassThru -ForceNote: "GPN" is a placeholder for the name of your VPN connection.